• Skip to primary navigation
  • Skip to main content
  • Skip to primary sidebar
  • Skip to footer
  • About this Site
  • E-Booklets
  • Shop
  • Resources
  • Consulting

My Chemical-Free House

A Guide to Creating a Healthy Home

  • Healthy Building
    • Insulation
    • Windows & Window Treatments
    • Glues & Caulks
    • Grout & Mortar
    • Drywall
      • Drywall Mud & Wall Texture
    • Showers
    • Doors
    • Pressed Wood Products
    • Sheathing & Subfloor
    • Pipes
    • Alternative Building Systems
    • Non-Toxic Prefabs
    • Building for the Chemically Sensitive
    • How to Test Materials
  • Healthy Interiors
    • Flooring
      • Gym Flooring
      • Flooring Underlayment
    • Kitchen Cabinets
    • Countertops
    • Mattresses
    • Sofas
    • Leather Furniture
    • Desks and Chairs
    • Sealers
      • Paint
      • Mineral Paints
      • Linseed & Tung Oil
      • Natural Wood Pigments
      • Natural Plaster
      • Natural Countertop Sealers
      • Concrete Sealers
      • Wood Finishes
    • Bathroom
      • Bathroom Vanities
    • Rugs
    • Wallpaper
    • Kitchen Appliances
    • Heaters
    • Reduce Flame Retardants
    • Reduce New Home Offgassing
    • Reduce Fragrance & Smoke
    • Air Purifiers for VOCs
    • Cleaning Products & Air Fresheners
    • Personal Care Products
    • Green Certifications
    • Gift Guide
  • Healthy exteriors/gardens
    • Decking Materials
    • Deck Stains
    • Deck Cleaners
    • Exterior Paints
    • Sealant for Concrete Birdbaths
  • Tiny Homes and Trailers
    • List: Simple Homes & Shelters
    • List: Trailers & RVs
    • List: Emergency Housing
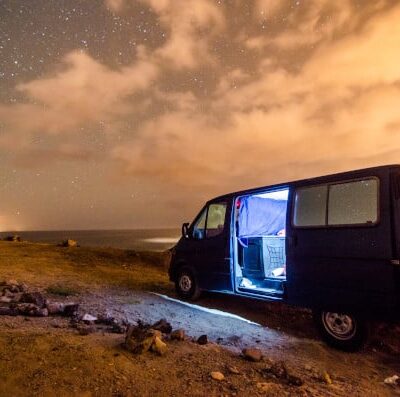
    • Cargo Van Conversion
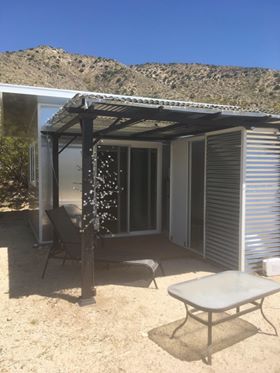
    • All Metal Tiny Home
    • Simple Insulated Shelter
    • All Aluminum Travel Trailer
    • Cargo Trailer Conversion
    • Teardrop Trailer
    • Tiny House Systems
    • Flooring for Vans, Trailers
    • Composting Toilets
    • How to Offgas that New Car Smell
    • Building for Chemically Sensitivity
  • Mold-Free Building
    • A Detailed Mold Preventative Build
    • The Causes of Mold in Tiny Houses
    • How “High Performance” can Help Prevent Mold
  • Mold-Free Interiors
    • Mold Testing Overview
    • Air Purifiers for Mold
    • Ozone to Kill Mold
  • Mold Avoidance Paradigm
    • Decon your Car
    • Camping Gear
    • Planning a Sabbatical
    • Traveling with Environmental Sensitivities
    • Locations Effect Ebook
    • The Locations Effect โ€“ Canadian Locations
    • The Locations Effect – Caribbean Campsites
    • Interview: Healing MCS with Mold Avoidance

mold avoidance paradigm

Review of Boxabl, Home of Elon Musk

July 12, 2021 by Corinne 19 Comments

Review of Boxabl SIPS Prefab House

The company Boxabl has created a metal SIPs (structurally integrated panel) house that has caught a lot of folksโ€™ attention.

The main reason it has gone so viral is that it promises it all โ€“ fast, easy, cheap, resilient, and healthy.

My job as a Building Biologist is to review homes for durability, indoor air quality and resilience to mold.

It may be cheap and fast, but is this home a durable and healthy home?

First, is it “eco-friendy”

The basic structure of this house is a steel and styrofoam structural panel. This is very safe even for those with chemical sensitivities. That part has practically no offgassing and I am a big fan of SIPS.

They also use MgO (magnesium oxide) board on the interior surfaces which is generally safe option as it has extremely low or no offgassing in my experience.

Itโ€™s not clear how that is attached to the walls in this case, itโ€™s likely glued on, which could be a problem for offgassing. (More on in the inherent risks of MgO against steel below).

The flooring appears to be glue down vinyl, though they have described it in different ways. The countertops and tabletop are laminate (which is a melamine plastic glued onto a substrate which is almost always MDF). And the interior cabinetry is conventional (which is typically particle board and laminate).

These three elements will contribute to offgassing – VOCs, plasticizers and glue from the vinyl floor; glues and formaldehyde from particle board based cabinets; and glues and formaldehyde from MDF based laminate countertops.

While this is not high in offgassing per se, according to conventional wisdom, it absolutely could be too high for those who are sensitive to formaldehyde.

At this time the interior cannot be customized and it includes all the interior finishes other than the bed and sofa.

Even though it would be quite easy to choose your own healthy floor and cabinets in theory, it would likely be difficult to remove the already glued down vinyl.

With just a little more effort this company, they could have reduced offgassing significantly by choosing better cabinets, countertops and floors. (Though keep in mind we do not know the exact materials or brands used so I am making some best guesses based on what is most typical right now).

Is it a durable design?

In general, metal SIPS are very resistant to mold because as long as the wall remains laminated they are immune to condensation problems. Moisture cannot get into any wall cavity to find a cold spot to condensate.

If they are well connected and well sealed then they could also be durable against leaks. The waterproofing will depend on how well the seams are connected. I owned a metal SIPS trailer (Camplite) that was very leaky!

There are a number of concerns I have with this house:

  • There is a clear negative lapย at the bottom of the first piece. Itโ€™s not just an exterior trim detail, itโ€™s integral to the design. I donโ€™t see how you would not always be battling water pooling up and soaking the wall.
  • Itโ€™s nice that it unpacks quickly into a full livable house butย how are all those seams waterproofed?ย I do not think we have enough information on that right now.
  • Because itโ€™s done almost entirely in a factoryย we would need to see a detailed factory tourย to see if this is a good design (the company does not yet have a full-sized factory and is still raising money at the time of writing). There are so many details I would want to see including how the windows and all seams are waterproofed.
  • The house, like all prefabs,ย needs to be seen in person, especially during installation to see if there are any areas vulnerable to water. Because this company does not have a show house and is not in full production yet, itโ€™s highly unlikely you will be able to see one any time soon. Myย prefab postย goes over the due diligence needed here, and with this house, we donโ€™t have enough information to even do the due diligence.
  • MgO and steel have not gone well togetherย in the past.ย In Denmark, massive problems (and lawsuits) resulted when salts naturally leached out of MgO board and corroded the metal in the buildings.
  • The website says that Boxabl โ€œdoesnโ€™t use lumber or sheetrockโ€ and in an email they said โ€œwe do not use wood or materials that can rot or moldโ€. But inย multiple videos,ย wood appears to be the framingย of the edges of the SIPs. Hidden wood in a metal-based house is a problem in my books.

Is this a reliable company?

Still in development

Well, I donโ€™t think we know if this is a reliable company yet. As I discuss in my general prefab post I never go with the prototype of a prefab. They commonly have problems.

There could be situations in which we know a lot about a company, the construction details, and the testing of the prototype, but I donโ€™t see enough information here to be confident.

The company needs to raise 10 million dollars to be in full production, and at the time of writing they are still raising money. They are not yet at production stages.

Inconsistencies

On the fundraising page it says โ€œearly investors get a discountโ€. When someone asked what the discount is they responded โ€œIt is possible there will be a discount. We havenโ€™t announced it yet.โ€

In one of the videos, the rep states that you could install this without a foundation or permit. That sounds ill-advised.

It does not seem like the reps actually know what the floors are made of.

Elon Musk Involvement

It definitely adds legitimacy that Elon Musk is living in one. But it’s unclear whether he is backing the company or not. His area of expertise is not in construction but it would be great if he did lend his mind to making this a better built home than what it looks like. It has great potential to solve the problem of lack of affordable and healthy housing around the world. But in my view this house has not proven itself yet.

Filed Under: Healthy Building Tagged With: Healthy building, mold avoidance paradigm, mold prevention

Mattress Covers to Seal in Toxins, Block Dust Mites

January 29, 2021 by Corinne 3 Comments

Seal in Flameย Retardants, Dust Mites & Mold Spores

1. Polyurethane Lined Covers

If you have an old mattress and you want to block flame retardants from migrating out of the mattress, use a cover like Organic Lifestyle’s Bed Bug Cover, which is also waterproof and will protect you from dust mites and bedbugs as well.

Another good use for this cover is when you are moving a mattress into a high humidity environment like a trailer, or you have to put a mattress on a flat surface like the floor for a while.

The polyurethane did have an odor to me but after some offgassing, I found it to be great.

2. Polyethylene Covers

Polyethylene covers are the least toxic plastic cover but they do not hold up very well after washing and are not usually marketed as mattress encasements.

I have used the Uhaul mattress encasements for temporary protection from contamination or if I need to put a mattress on the floor in a hurry. These are disposable (not washable).

3. Polypropylene Covers

There are polypropylene covers as well, they hold up a little longer than plain polyethylene.ย 

This All in One coverย is a mix of polyethylene and polypropylene and is reported to be very tolerable by someone very sensitive to plastic.

They do slow down offgassing somewhat, from the foam or secondary scents, but usually, these VOCs eventually soak into the plastic layer, so it’s not a permanent solution.

Mattress Encasement to Fully Block Offgassing, Pesticides, and Other Contaminants

Block Offgassing with Aluminized Tarps

If you do not have a choice but to use a mattress that is offgassing or fragranced and you want to block the odors/chemicals, you can use aluminized tarps and tape.

I have used these to sequester many beds, especially when traveling.

Discard as soon as the aluminum flakes off, or face the aluminum down.

The other option would be thick mylar bags (not the thin sheets).

Mattress Cover to Block Dust Mites

Cotton Covers

If you just want a dust mite cover (that is not waterproof, and doesn’t block flame retardants) I use these Allersoft cotton mattress and pillow protectors.

That brand is not organic but they were good for me after one wash. I’m really happy with them as they have reduced my allergies and the price is a steal.

For organic cotton versions, I like these pillow covers. These are still reasonably priced.

A full organic cotton mattress encasement is going to cost more. The Solus brand is priced well at around $100.

Barrier cloth can also work here.

Filed Under: Healthy Interiors Tagged With: healthy interiors, mold avoidance paradigm

Non-Toxic Travel Trailers for the Mold and Chemically Sensitive

January 6, 2021 by Corinne 77 Comments

This article focuses on the healthiest trailers. The first priority is that the trailer holds up to mold. If it doesn’t hold up to mold, no amount of natural wood, or wool, or other eco-friendly material really matters.

Conventional trailers are extremely mold-prone. They use wood within the walls, roofs, and floors with a design that is not airtight. Condensation usually forms in the cavities. They are also prone to leaks.

The Designs That Best Hold up to Mold are:

  1. Sandwich construction – Airtight cavities of metal or fiberglass with rigid foam insulation. Ideally laminated together.
  2. Fiberglass shell campers – Solid fiberglass body trailers are single or double hulls. A single hull has no hidden cavity where condensation or mold can form. The double hulls can work well too. I list brands that have minimal wood or where the wood does not become a mold risk.

Low-VOC Trailers:

No well-made trailer is extremely low in VOCs. Some are better than others.

The interiors of all-metal trailers can be lower in offgassing compared to trailers with other wall materials. But don’t underestimate the odors of the glues used in all metal trailers.

There is no getting around the offgassing. The best strategy is to give it some time to offgas or buy a used one if you are highly sensitive.

You certainly can compare models though if you are chemically sensitive since we all are reactive to different chemical combinations. You definitely could find some brands more tolerable than others, even if the total VOC count is the same.

You should also use mitigating strategies like a bake out, and shellac to block the offgassing. Shellac is ideal on metal, fiberglass, vinyl, and many other materials. You can remove shellac later with alcohol.

Some brands are formaldehyde-free but that has not been a big focus of mine since there are many other chemicals used in the construction of trailers.

Updated Winter 2020/21

There is no affiliate or sponsored content in this post.

Trailers for Chemical and Mold Sensitive Folks

1. Metal Travel Trailers

ATC Aluminum Toy Hauler

Photo via aluminumtoyhauler.com

ATC is a mix between a cargo trailer and a high-end trailer. They look industrial compared to the Living Vehicle below (made by the same factory).

They claim to have no wood whatsoever and similar construction to the old Camplite design. They do have fiberglass insulation in the ceiling but the rest is foam.

The interior walls are Azdel.

The 24″ units have a bath, kitchen, eating area, couch that is made into a queen bed, and extra cabinets.

Bryan Rosner, a mold-sensitive person, has a good video tour of one here.

Cost – The 20 ft base model with no upgrades starts at $38,390 USD. The 24 ft models start at $41,530 USD. When a client priced it out with taxes and fees and the options she wanted, it came to 55k.

Weight – The 20 ft base model weighs 4,500 lbs.

Camplite

The Camplite I owned CC BY-NC-SA

I had a Camplite by LivinLite travel trailer made to my specifications and you can find all the details about that here.

The key thing I look for in a trailer is moisture-proof walls and laminated sandwich insulation.

This laminated metal-foam-metal was the key to moisture-proof walls in these old models.

You may still find a used one with sandwich laminated walls before they changed the wall system. The company is now out of business.

Cost – You can find a used 2014 (21 ft) for 18,000 USD (or less, depends on the size).

Weight – A 24 ft model weighs about 3,100 lbs (depends on the year and configuration).

Hero Camper

The Hero Ranger, Photo via www.herocamper.com

A new to me trailer, the Hero Campers are the most ideal design. The walls, floor, and ceiling are all a sandwich construction just like the old Camplites, except those didn’t have insulated floors.

I was really excited to find this one. The envelope is constructed of fiberglass (on the outside)-foam-metal. Perfect. The best construction for mold prevention.

The interior is metal which is great for those with chemical sensitivities, though keep in mind all new trailers have offgassing from the construction adhesives.

It has a small kitchen on the exterior, two options for heater types, no bathroom.

This is a European company, they have many dealers throughout Europe. They also have a dealer in Arizona, one in Australia, and one in Israel.

You can rent one in California on Outdoorsy.

Cost – The 2021 Hero Ranger is going for $21,995 USD through Tom’s Camperland in AZ.

Weight – The Hero Ranger is 15.8 ft and weighs 1,911 lbs.

The Safari Condo

Photo via safaricondo.com/en/travel-trailers-alto-serie-r-1713

The Safari Condo is another great option to consider. A bit of a hidden gem, this one.

The roof and walls are made of a “sandwich-type material with a plastic honeycomb core laminated with Alufiber on one side and aluminum on the other.”

That main core is not foam or fiberglass insulation, it’s a honeycomb polypropylene.

Alufiber is an aluminum and fiberglass product.

This sounds like a very moisture-proof design to me.

They say the only materials used in the Alto body are aluminum, Alufiber, plastic, Formica, and glass. The furniture is mostly made of aluminum and composite materials.

They need a fair amount of time to offgas for most sensitive people, though some less sensitive have used them brand new. I have heard from one person who found this trailer to be higher in offgassing than most other trailers.

Cost – Their travel trailers start at $37,500 Canadian Dollars. The more popular 1713 model (17 ft) has the pop-up roof (built well) and that one is about $40,000 Canadian dollars.

Weight – The 17ft (1713) model is only 1,825 lbs.

Custom Metal Trailers

Customised

You can customize a small metal trailer custom-made in the style of the Camplite, or more like a tiny home on wheels. Customizing these structures tends to get very expensive. And it’s not common to find someone with this expertise to build them. It’s better to work with a company that makes metal trailers already and make some alterations.

Metal SIPS

I have also seen cargo trailers and larger homes on wheels custom made with metal SIPS. This is metal-foam-metal laminated together. A very watertight construction if done well. It is supposed to have another siding on the exterior of the SIPS.

Porcelain Enamel

Another type of non-toxic trailer is porcelain enamel on steel. This is an extremely tolerable material but it is not cheap. It’s very rare to see a porcelain trailer for sale, many of them were made on poor quality RV shells which is a shame because the porcelain enamel is highly tolerable on the interior.

If you find one for sale you may be able to use the interior to rebuild a trailer around.

Cargo Trailers

My cargo trailer, converted into a camper CC BY-NC-SA

Joey, from HealClick, breaks it down to the essentials and delivers a safer trailer for $7000. Here is my post about my conversion.

There is a lot more that has to offgas in these simple trailers than you might think. They take about a year to offgas to minimal levels.

And they are way trickier to insulate than you think as well. Common brands have leak problems. More robust brands should be used if you are going to insulate it.

Weeroll

A Weroll all metal trailer CC BY-NC-SA

The Weroll is similar to a cargo trailer but is more customized and you may be able to reduce the off-gassing with this option as well as streamline the process of converting it.

Those who bought the Weroll seemed to tolerate them right away. Probably due to high level of customization.

But insulating a cargo trailer, including a Weeroll, is no simple project. My post on vans describes the process.

As of winter 2021 I don’t recommend this trailer for sensitive folks. I’m waiting to hear more updates before removing this from the list.

Cost – The Weroll all-aluminum Silver Eagle 10 x 6 ft with insulation (no kitchen and bathroom), wired with outlets is $9,500.

Weight – Depending on height and options, the 10 ft can be as light as 1,080 lbs.

High-End Metal Trailers

Airstream

Airstream trailer

Airstreams with metal walls are far more tolerable for the chemically sensitive than most other trailer options that have a kitchen and bath.

The metal airstreams (they do have fiberglass ones now too) are metal walls and metal ceiling with, obviously, metal exterior skin. The flooring is vinyl over a plywood subfloor.

The offgassing is not too bad and does go down at a reasonable rate. The resale value is quite good for a trailer/RV.

I like the metal interior walls, they cut down on offgassing and they are way better made than your typical wood-framed crappy RV.

Some of their showrooms are inside warehouses which may help preserve them.

However, this needs to be 100% airtight on the inside walls and the exterior walls to not have vapor get between those skins where it will be mostly doomed to not come back out. (Some caveats would be that if you never heat or cool this then it’s not really a worry, unless it actually leaks).

The shells are sealed really well right out of the factory and they do perform aggressive water testing on the shells. They then add fiberglass insulation and an interior metal skin.

I would be sure to check every opening on the interior shell as well to make sure it is sealed. That also needs to be airtight.

If you are rebuilding one you also need to seal this as well as they do in the factory. Seal up every seam, every opening, install airtight sockets, etc, then test again (with water or a blower door test), making sure it’s totally airtight.

You can prolong the life of any trailer by keeping a roof on it when stationary, not driving it in the rain, moving to climates that don’t require heating or cooling (heating is usually the cause of most of the problems in RVs but in this case with metal on both sides both heating and cooling can cause condensation if there is water vapor in the walls), and showering and cooking outside.

Always keep up with your inspection and sealing on the exterior and the interior.

You can find airstreams to rent on Outdoorsy and other sites, making this an appealing option that you can “test drive”.

I do think that they are still a strong option to consider, especially for folks sensitive to chemicals and mold. With a high resale, low initial offgassing, and an expected lifetime of a few years for extreme mold reactors it can work really well.

Cost: The aluminum airstreams start at $40,000 USD for 16ft. They have many sizes all the way up to 33 ft and about $170,000 USD.

Weight: The 16 ft aluminum model weighs 2,585 lbs and the 30 ft model weighs 7,788 lbs.

Living Vehicle

Photo via livingvehicle.com

A newer company making well-tolerated trailers is Living Vehicle. They use polyiso foam insulation sealed with tape in the walls. The interior is almost entirely aluminum including the cabinets.

The countertops are Corian. The flooring is sheet vinyl by Armstrong (common in trailers but fairly high in offgassing – it may not work for many but they could customize this with another option). See my list of safe flooring for trailers.

The cushions are polyurethane, countertops are zero VOC. The offgassing of the trailer in general has been reported to be very low.

This is a rare find because of the almost fully aluminum interior, no structural wood (no hidden wood in the new models for 2020, and no wood in cabinets, only in the table).

The walls are made of metal framing, metal exterior, and metal interior walls with polyiso foam on the interior side of the metal framing (with the air gap left behind, between the framing members).

The trailer also has a crawl space where the plumbing is very accessible. Even if there was a leak in the all-aluminum “basement”, it would be easy to clean up and easy to fix because of the access.

The company is open to some customization. I have spoken to them about this, if you would like help customizing the insulation, or interior materials like the flooring please get in contact.

The 2019 had wood in the floors.

Cost: The 2020 models are 29 ft and start at 200,000 USD.

Weight: They weigh in at 10,700 lbs, meaning you need a top of the line truck to tow this.

2. Fiberglass Travel Trailers

Egg-shaped campers are usually made of solid fiberglass shells (either single or double hull) that are very mold-resistant and durable.

Many sensitive people say that fiberglass takes a year (or years) to offgas, but some find it offgasses to a satisfactory level in a few days or a few weeks. It’s very individual.

This is the best design to hold up to mold.

In terms of used trailers, molded fiberglass trailers are the best bet since the walls are less likely to become moldy with time.

Though fiberglass trailers can have problems with the wood subfloor if it’s not encased and if they have carpet on the walls that can go musty or get cross-contaminated.

Oliver

Oliver Fiberglass Trailer CC BY-NC-SA

The Oliver brand travel trailer is a popular trailer for mold avoiders.

I like fiberglass campers with molded fiberglass furniture like Oliver trailers. It makes for a simple, easy to clean, non-porous interior.

Very little wood is used, only in the cabinets.

They are double hull so they have a good R-value and can be winterized. The double hull overlaps at the seam, unlike Casita which is riveted at the seam.

The insulation between the hulls is polyethylene closed-cell foam, with an airgap between the hulls. There are weep holes at the bottom in between the julls, meant for condensation that forms between the hulls to drain out.

They claim R-16. The windows are dual pane.

It does not have wood products in the floor, making it one of my top choices.

It does have a ducted HVAC system that is not accessible in the floor (or rather, only partially and with great effort). They use flex ducts in the floor for the heating. AC is on the roof.

Using the propane furnace is the only way to keep the pipes from freezing when the temperatures drop below 0 C.

Oliver uses vinyl flooring but they can make you one without the vinyl floor. They can make it without the cushions, which makes it one of the best fiberglass option I have found.

Recently they have added a composting toilet option.

Many mold avoiders have done well with this brand, both brand new and used options. You can see a tour of the factory here.

Cost: They have two models, one is 18.5 ft long and starts at 50,000 USD, the larger one is 23″ 6″ and starts at $57,500 USD.

Weight: The 18 ft weighs 3,700 lbs and the 23 ft model weighs 4,900 lbs.

Casita

Follow Bryan Rosner’s healing journey on YouTube

Casitas use a carpet and foam that is glued on to the walls and floor. At the time of writing, they would not customize one without that element.

The nylon carpet and glued on polyurethane foam provide some insulation (R 6-7) and help prevent condensation.

Despite the carpet, many mold sensitive folks have done well with this brand. It’s been a staple brand in the mold avoidance community since the beginning.

It has a simple design, single hull (nowhere for water to hide) and mostly all visible components.

The floor is wood but it is totally encased in fiberglass on all sides. In reality, there is very little wood inside, and only in the cabinet storage areas.

Casitas are made in Texas, but recent reports were that new ones arrived clear of mold and other persistent outdoor toxins.

See Bryan Rosner’s video about his initial thoughts on the Casita for mold avoidance:

Cost: Casita makes two sizes. The most basic model is 16 ft and starts at around $18,500 USD. The 17 ft starts at around $19,500 USD.

Weight: Models range from 1,970 to 2,480 lbs.

Happier Camper

Happier Camper CC BY-NC-SA

Happier Camper is another company to check out as they don’t use carpet or padding on the walls and the floors are fiberglass too!

No vinyl on the floors is a rare find and will be preferable for many folks.

It’s double hull with Thinsulate in between the hulls.

The floors are composed of plastic honeycomb integrated with corrugated cardboard and fiberglass resin.

I like the modular nature of the HC1 interior. You can really simplify the interior if you need to or add the components that you need. The small units don’t include a shower but the larger ones do.

I’ve seen some problems with the first model (HC1). The friend who owns the one pictured had many problems on this unit when it was still brand new, and she claims the company took 7 months to make the repairs.

They are on the second model now in 2020 and have improved the doors and windows. I’m glad to see they have moved past the first prototype, made some changes and are still going strong.

I would like to see positive reports on the newer rendition before recommending it as the first iteration had way too many problems.

Cost: The HC1 is 10 feet and starts at about $25,000 USD, the new 2020 Traveller is 14 ft and about $40,000 USD. These are highly modular so the base cost might not cover what you need – adding a kitchenette to the HC1 brings it to almost 30K, fully loaded it’s almost 34k.

Weight: The 10 ft model is 1,100 lbs, and the 14 ft is 1,800 lbs.

Trillium by Outback

Photo via trilliumtrailers.com

Trillium is another great brand, this one by The Outback. It is single hull, made in Canada and they have been in business for many years.

They have closed cell foam (probably polyurethane on the walls) with marine carpeting.

They were willing to build without plywood in floors but it was difficult to convince them to leave the padding off the wall.

The price is quite good (and even better for Americans because it’s in Canadian dollars).

They only have one size, but they have a couple layouts.

Cost: The 14 ft trailer, starts at about $18,000 Canadian dollars. However, you need to add on some basics, including brakes and lights. If you add those and a bathroom as well it comes to a little over 20K CAD.

Weight: About 1,450 lbs average weight.

Trillium by L’air

Photo via Laircamper.com

L’air is another Canadian company reviving the old Trillium trailer style.

Both companies have molds from the original Trillium factory in Ontario, Canada. L’air though has two sizes, the 1300 (15.5 feet) and 4500 (15.2 feet).

Their floors are a plywood core inside of the fiberglass structure – this is similar to Casita’s floors. It’s not prone to mold in my experience. There is no plywood exposed that can absorb moisture in the floor.

They have also eliminated plywood around the windows that was used as a filler to hold the windows in past models. Over time that plywood would become wet and rot. Instead the windows are completely bonded to the camper body. This eliminates the leaks that develop around the windows in older Trillium campers.

The walls are covered with foam insulation and then marine vinyl which does not absorb moisture and is easy to clean. Many would prefer this to carpet on the walls.

Cost: Starting at 26K CAD

Weight: 1300 lbs for the smaller model and 1600 lbs for the larger model.

Nest by Airstream

Photo via airstream.com

Airstream came out with a fiberglass model the Nest in 2018. It’s single hull.

The construction of them is not super clear, one video describes the interior walls as “flex foil” (it’s not clear what that is), then a polypropylene “fabric” layer, then an interior olefin fabric which also means polypropylene or polyethylene.

You can see the fabric is rather smooth, I like this much better than the “carpeted” walls in all the other single-hull fiberglass trailers. Though I don’t understand what the insulation is behind the plastic fabric walls.

The cushion coverings are a faux leather, I’m not sure if it’s vinyl (which offgasss quite a bit) or polyurethane (which doesn’t offgas very much). But it does look very mildew and mold resistant.

The countertops are laminate with engineered wood products used in the cabinetry. The flooring is sheet vinyl.

The heating system uses some ducting, but the AC system is the usual roof system.

Thereโ€™s a full kitchen and wet bath.

Cost: The trailer comes in one size, it’s 16 ft and it’s about 43,000 USD.

Weight: 3,400 lbs.

Hร‰LIO Travel Trailer

The Hร‰LIO is not a single or double hull fiberglass shell – instead, the walls are a sandwich of fiberglass-foam-fiberglass. The insulation value is R-7.

It’s called a molded fiberglass monocoque structure and it has a solid aluminum chassis. The floor is a plywood wrapped all the way around in fiberglass.

It’s made in Quebec.

Cost: Depending on size and features, the dealers are starting them at 31K CAD in Spring 2021.

Weight of the 02 Model: 1550 lb. Length: 14 feet 2 inches long

Other Fiberglass Trailer Brands in North America

Scamp – Made in MN. Plywood or OSB floor, with fiberglass underneath but not on top. Single hull, carpet walls with Reflectix behind them. Some wood in the shell. Old Scamp trailers had vinyl headliner but newer ones have fabric headliner. Video of the factory here.

Escape – Made in British Columbia, Canada. Fiberglass single-hull with frames constructed out of steel tubing. A factory tour shows hidden wood framing in the walls. Vinyl flooring. The headliner/wall covering is vinyl laminated onto 3/8โ€ foam, creating an R-5 insulation value.

EggCamper – Double hull. Bubble foil insulation between walls but not contiguous all around trailer (only in some parts not others). Owner Jim hurt his back and wasn’t building for a while. The website claims they will start building again.

Burro – Out of business in 2001, you may find used ones for sale.

Boler – Out of business in the 80s. You would only find very old trailers for sale.

If you need help choosing a trailer that suits your mold or chemical sensitivities you can contact me for a one-on-one consultation.

European Brands of Fiberglass Trailers (Caravans)

Photo via sealander.de

In Europe, the Wigmann is a good fiberglass caravan (as they call trailers there). It has a solid fiberglass shell with no seams on the outside. The construction is fiberglass-spray foam-fiberglass, airtight. I like this design a lot and have not seen this in North America. No wood, no metal. It has a 10-year warranty on water ingress.

Sealander is another European fiberglass caravan that is all fiberglass on the inside and out, exactly what I’d be looking for.

UK company Freedom Caravans has a fiberglass exterior but it is not the same as the molded fiberglass models. They have a 25-year warranty on water ingress which is very impressive. Though with a fiberglass exterior and more standard wall, condensation could be a bigger risk than leaks.

3. Wooden Teardrop Trailers

Custom Built Teardrop

Pat’s trailer from my post on wooden teardrops CC BY-NC-SA

A small teardrop can be made of all wood like the trailer pictured that I showcased in this post.

The main challenge here is in heating climates the metal base, metal or membrane roof, and walls are all a challenge for mold prevention.

If this style of trailer is used in heating climates, you can build up off the metal trailer to avoid condensation and mold below, a technique illustrated in this post.

With the roof, you cannot have an exterior vapour barrier (and a double vapour barrier is too risky). You would need to fill in the ceiling with 2 part spray foam or rigid foam + spray foam as outlined in the van post.

The walls can be wood that in uninsulated, that can work. If you add insulation you get into much trickier territory.

This trailer would work really well in climates where you don’t heat the interior. Either AC use or no heating or cooling would mean you don’t have these issues with the metal trailer base and roof.

If you have high humidity use mold-resistant woods like cedar.

A company that makes trailers similar to this, Homegrown Trailers, uses wool insulation, this means they have a challenge in heating climates that in my opinion cannot be overcome. I cannot see any way that this would be mold safe.

Cost: The 16 ft trailer came to $10,000 Canadian dollars in materials, the labor would be about an extra 10K. It has basic wiring, no plumbing, and a basic outdoor kitchen.

Weight: About 4,500 lbs.

DIY Teardrop

Photo via Chesapeake Light Craft

This is either a DIY kit or plans to make this wood-based teardrop trailer.

Although the main material is wood, it’s essentially a fiberglass trailer as it’s totally coated in fiberglass. This is built like a boat, and as long as all gaskets are done well this should not have moisture issues.

I have not seen this design in person however.

The kit includes the wood, cut to the right sizes, fiberglass, epoxy, and all basic parts. All surfaces inside and out are sealed with epoxy.

It comes with plenty of epoxy to coat and seal the trailer, the necessary final finish – varnish and/or paint – is sold separately.

The metal trailer is not included.

It’s not quite as simple as it looks, it takes about 250 hours to complete.

Someone with an illness related to toxicity could do some parts of the build themselves but not the fiberglass and epoxy. And probably not the varnish either. Though epoxy finishes generally come to a complete cure, so even those with moderate chemical sensitivities might do well with this option once it’s cured.

Check out their website and videos.

Cost: $2619 USD for the kit or $199 for the plans.

Weight: The shell is 250 lbs when fully outfitted and accessorized. With the trailer weight included, it will come to 500-600 lbs.

Vans and Truck Campers 

Cargo Van Conversion

Converted Camper Van

Here is my post on converting vans into campers in a mold-safe way.

Anything with an exterior metal wall is inherently tricky to insulate for weather where you heat the camper.

If you don’t heat the van in any way or only use AC, this is an easy solution.

The company Innovative Spaces can build out a cargo van. I don’t have direct experience with them.

Decommissioned Ambulances

Solona’s ambulance

When I first saw Solona’s incredible recovery from CFS and MCS I was immediately impressed with this converted ambulance.

Looking more into how they are made, I found there are a few different ways of insulating them. I was not able to identify which company made this one.

It looks like most of them use rigid foam (polyiso) in the metal-framed walls and then use aluminum as the interior walls. Whatever they did in these walls to make them so air and vapor tight, it’s working.

This mobile home has held up really well to mold – an unusual feat in the RV world.

On top of that, it was an absolute bargain. This is the best value for your money of any of the options here. If you can find one that is as mold-safe inside as this one you have struck gold.

Solona paid around 9K CAD for her used ambulance in the video (and pictured above).

This is similar or the same construction as the old Camplites, ATC and Living Vehicle, but much less expensive. It doesn’t have a bathroom or kitchen though. In the video, Solona explains how she is making that work.

The government sells these off every so often. You might also find one that was already bought and is being resold by a private owner.

https://www.youtube.com/watch?v=LyBQ_l4yG-A&t

Refrigerated Trucks/Vans

Via bushspecialtyvehicles.com

Refrigerated trucks come with insulation already attached in a way that looks quite well done to me. You would want to confirm with the vendor how the installation was done.

You will also need to add air via a window or roof fan.

I like this a lot better than converting your own van because it’s such a tricky process to get the foam installed correctly. This is far easier because it’s already done for you.

For me the ambulance and the refrigerated vans would be my choice before a custom conversion.

Conventional RVs

Some mold avoiders have been using conventional RVs and trading them in if (when) they go moldy.

A few companies that some people like are:

Bigfoot – Made of fiberglass, EPS, and luan, with vinyl flooring. This does have wood in the walls. Though one person who is not that sensitive has done well with it, it’s not what I would go for.

Forest River RV Sunseeker Class C. A “Greener” RV company. Sunseeker has 1 piece fiberglass roof, aluminum frame, block foam insulation, no fabric except valances and bedspread and is “low VOC”. I really like the roof on this model.

Other Forest River brands are low VOC and slightly better construction than usual.

Coachman is also low VOC, mold avoiders have liked the Freedom Express and Apex Ultra Lite. Bryan Rosner outlined the strategy of going with Coachman and trading them in as needed. Here is his blog post and youtube video about this.

Don’t expect a traditional RV to last very long in terms of mold. Be prepared to trade that in in one or two years.

Many people cannot tolerate this level of offgassing, though the level has been improving in the last few years as more models go greener. Many are formaldehyde-free now. This is a strategy for folks who are mold sensitive and not very chemically sensitive because you have to go brand new here.

Also factor in the depreciation and loss of sales tax in this strategy.

It’s a good idea to see one of these in person before purchasing, unlike some of the custom trailers.

Tiny Homes on Wheels (THOWS)

If you fancy a tiny home that is semi-mobile (can be moved around, but ideally not too much), I would go for a small wood or metal structure.

I no longer recommend Tiny Green Cabins, Swanson or Tiny Healthy Homes because of the issues I have seen with their production and construction.

There are no specific tiny home companies I can recommend at this time. However, if you would like to set up a consultation we can go over finding a good builder and how to supervise the build.

I don’t know of one for less than 60K. Budget at least 65K. Look into the experience of the builder, talk to past clients and look at what kind of warranty they offer.

See my post on the top 10 causes of mold in tiny homes and example of a well-built house mold preventative house here and here before proceeding.

My tiny house on wheels CC BY-NC-SA

Corinne Segura is a Building Biologist Practitioner with 7 years of experience helping others create healthy homes, including alternative homes, trailers, and shelters.

I have owned and lived in three trailers: my tiny house on wheels, a custom Camplite and a converted cargo trailer.

healthy home build consult

Did you find this post helpful? If so you can buy me a coffee to support the research behind this blog. Thank you!

SaveSave
SaveSave
SaveSave
SaveSave

Filed Under: Mold Avoidance Paradigm, Tiny Homes and Trailers Tagged With: mold avoidance paradigm, tiny homes and trailers

A Guide to Non-Toxic Camping Gear (And Keeping it Mold Free) | 2022

January 4, 2021 by Corinne 66 Comments

I have updated this post after having spent two years of close to full-time camping.

The focus is still on avoiding chemicals, but I am adding more unusual camping equipment and techniques for avoiding mold, updating new gear I really like, and some new tricks.

This post contains affiliate links wherever the brands I like have an affiliate program. Upon purchase, I earn a small commission at no extra cost to you.

Choosing a Tent Style

A Cheap and Easy Start – Pop Up Tents

I bought a pop-up tent as my first tent. I went for one of the cheapest options here just to get started quickly. I was able to use it after one week (with the doors all open at first for air) but it was about 1 month before I found it offgassed the chemical smell, and I could close up the doors. I was super sensitive at that time.

A number of brands have pop-up tents in this style which are super easy and quick to put up and have a decent design in terms of the amount of ventilation (more on the style I prefer with ventilation below).

Mine leaked in heavy rain so I don’t like this style of tent, other than the fact that it is very easy to pop up and if you get a good tarp over it you will be waterproof – I always put a tarp over tents now anyway, more on that later.

Anyone super challenged with putting up tents might want to start here.

My simple pop up tent outside of a cod house
My First Tent CC BY-NC-SA

Rain Fly Styles – Preventing Mold and Avoiding Chemicals

a orange tent with a rainfly that comes all the way to the ground

For heavy rain, a tent with a really good rainfly is needed that comes down almost all the way to the ground like many of the REI or MEC brands and this Backpacking tent (pictured left).

I used the Winterial version of this style for many months and was very happy with it. (This brand claims no flame retardants).

When it comes to tents on the ground, this is the main style I look for because of the good rainfall, which keeps it more waterproof.

Having mostly mesh on the inside also reduces your exposure to chemical offgassing and helps to prevent condensation on the walls.

Technically you don’t need a tarp over it, but I always add one. Water that soaks the tent walls will then soak anything that is touching the walls inside. The tarp is also needed so you can get in and out when it’s raining.

I just don’t trust any tent enough to not put a tarp over top. More on setting up tarps later in the post.

Tent Styles and Offgassing

Sometimes the rainfly smells stronger than the tent and sometimes it smells less. Sometimes a super beefy tent bottom is the hardest part to offgas. It depends on the brand.

Some who are trying to reduce exposure to chemical offgassing wash the tents to remove some of the treatments, but this also removes some of the waterproof coating. That can still work if you have a good tarp over.

The more mesh you have the more airflow and the less exposure to offgassing.

Bivy Tents or One Person or Stealth Camping

For stealth camping on patios and balconies of hotels or Airbnbs I have used a one-person tent like this Winterial brand. I also like this Tenton brand (I like that it comes with straps to strap it to a camping cot below to raise it up).

You can also look for tents called bevy tents.

A camping set up on a balcony that is a rainfly strung up with a camping cot underneath
That’s me all tied up on a balcony CC BY-NC-SA

I have tried just a mat with a mosquito net over it (this one is not treated with pesticides), and I have also strung up just the rain fly (with no tent) over a camping cot and Thermarest if there are no bugs.

Otherwise, you can cut out the bottom. Never put a tent with a bottom right over outdoor tiles, bricks, or concrete for long, you will have a recipe for mold fast.

You can put up a tent on top of a camping cot like in the pictures of the Tenton one-person tent linked to above. But to keep a low profile I prefer to use a camping cot and then string up the rainfly or mosquito net so it does not go higher than the balcony rails.

If you have a stable place and are not on the move, I like these garage/deck tiles to lift you off the concrete. I’m trying them out now.

Choosing a Tent Style if you are Putting up a Tent when Disabled 

Make sure you know how (and that you can) put up your tent alone (as well as set up other supplies like a stove) before you get to the campsite. I have shown up to campsites with tents that are defective or missing parts more than once, so I would do a trial run for that reason as well.

For those who are disabled and limited, I made this video on Camping for Those Who Can’t Camp, to try and give some examples of how camping might still be possible for you.

Brands of Tents that are Low in Offgassing

I like putting tents in the sun to offgas them. Smell them to test, and also touch them to make sure they don’t cause skin irritation. You may have to test them by sleeping in them to test for tolerance.

Moonlight thetentlab.com

Brands that seem to be the lowest in offgassing are:

There is no consensus on which brand is the best for those with chemical sensitivities. Everyone is so different, no tent is perfect, and for some less sensitive there might not even be a big difference between the brands. You have to test them out for yourself if extremely sensitive.

For the mild-moderately sensitive:

  • Lightspeed (polyesters with PU coating)
  • REI (polyester, rainfly, and floor coated with PU) has been used by some very sensitive folks.
  • LL Bean (polyester with PU from what I have seen).
  • Big Agnes (nylon, polyester with PU and some silicone).
  • The jury is out on Coleman, some people tolerate it and others donโ€™t.
  • Some people find cheap Walmart tents especially Ozark brand is more tolerable than ones for hundreds of dollars. I have found Ozark tents to be very tolerable myself.
  • Winterial may work for some folks. I used this as I was becoming less sensitive. I like that it is affordable and doesn’t contain flame retardants.
  • Nemo Aurora

For the moderately to extremely sensitive:

  • Cuben fiber tents – Cuben Fibre is PET, this can be more tolerable for the very sensitive but they are more expensive. Many have said these don’t contain FR, but Zpacks failed to get back to me on that.
  • Moonlight by Tent Lab – All FR-free and coated with silicone on the outside and polyurethane (PU) on the inside. This brand is often touted as being better for the chemically sensitive but I have found there is not enough consensus on this. With many not tolerating it. At a steeper price than your average tent, you should test it out first. They send fabric samples.
  • Six Moon Designs – silicone nylon fabrics, very low odor,.

Silicone-treated tents might be more tolerable for some, others may prioritize avoiding flame retardants.

If you are too sensitive for any of these brands there are more options further down in this post for those who have to go more extreme.

12 Tent Brands Without Flame Retardants 2022 

  1. Mountain Hard Wareย tents made after 2019 are FR-free ($200-310 price range)
  2. TarpTents ($270-500 range)
  3. Fjรคllrรคvenย tents ($500-1000 range)
  4. Diamond Brandย tents ($300-350)
  5. Nemoย Chogori and Aurora tents don’t have FR ($700-850 and $250-300)
  6. Moonlight All FR-free and coated with silicone on the outside and polyurethane (PU) on the inside. ($430-600)
  7. Winterial does claim no flame retardants in discussions, although they don’t have an official statement on this. ($100-300)
  8. NatureHike has claimed no flame retardants in private emails and confirmed by factory reps who sell to wholesalers. ($100-200)
  9. Six Moon Designs none of their tents are treated with flame retardants and they have many silicone nylon options (Silnylon) ($270-340)
  10. TETON Mesa Canvas Tents and the Sierra Canvas Tents do not contain flame retardants. The company has given contradictory info on whether ALTOS Backpacking Tents are FR-free ($100-$600)
  11. The North Face all tents free of flame retardants as indicated by their chat (though it’s not clear that is accurate) ($150-$1000)

Some canvas tents do not have flame retardants.

Cuben fibre from what I have seen is FR-free.

I have not found any evidence that many flame retardants can be adequately washed out, but it can’t hurt to try.

Camping Gear without Flame Retardants 2022

  • Thermarest Camping pads don’t contain FR. Some have the Prop 65 warning (but for chromium).
  • The Exped mats are FR free since the 2015 lot.
  • REI brand sleeping mats are not treated with FR.
  • TETON sleeping bags, camp pads, and pillows have been tested to verify that they do meet CPAI-75 standard without adding any fire-retardant treatment to the materials
  • Wildkin sleeping mats and sleeping bags are also FR free.
  • Other sleeping bags that are FR free are Holy Lamb Organics (but they use cotton), Kelty, Wiggy’s, and the down quilts by Jacks ‘R’ Better.
  • All wool sleeping bags by Lucky Sheep (ask them for all wool with no cotton).

Unconventional Tents for the Extremely Sensitive

Aluminum Insulated Tents

These tents have the benefit of insulation, and the aluminum coating reduces offgassing. They don’t do well with humidity inside the tent if there is a warmer inside.

WeatherHyde tents are insulated and the foil on the inside will also block most of the VOCs from the fabric on the outside. They say you can sleep in them down to 0 degrees Celsius. They are 269 USD. They do not have any mesh for ventilation which I imagine would be quite the problem for condensation and I do not know how you would get fresh air.

The Shift Pod is another version of an insulated aluminum tent made for Burning Man. The benefit to the aluminum on the outside is it’s reflective of sun and heat. I would think it would have similar problems with condensation in most situations. It’s pricey at 1300 USD.

For 18 USD you can get this aluminum-lined small sleeping tent (that might work for balcony sleeping or in an emergency, otherwise it’s difficult with a lack of ventilation). The aluminum on the inside is more tolerable than the usual plastic.

Home Made Tents

Others have made homemade tents with materials they can tolerate like Tyvek, Reflectix or XPS sheets. You can also make a more typical tent from untreated nylon.

More info on that in this post here.

Canvas Tents

Some folks who cannot handle the chemicals in the synthetic tents have tried canvas tents.

Some companies people like are Reliable Tent, Kodiak Tents, Davis Tents.

Are they Mold-Prone?

These do not hold up well to rain and high humidity and I would not use them in rainy or humid conditions nor expect them to last very long at all.

I have seen canvas tents, specifically, Davis tents hold up for quite a long time in a dry climate and with a woodstove inside. It can take rain and even snow, as long as it can dry out. For long-term living a gravel floor or a raised-up wooden platform is best.

Hemp Canvas

For those who don’t tolerate cotton or who want the tent to hold up a little longer than cotton canvas, you can make one out of hemp fabric, like this one. You can expect cotton and hemp to last a short while in dry non-humid climates where you are expecting very little or no rain for a while.

If you are making your own tent out of canvas or nylon you can use the tube structure of a conventional tent and build it around that.

Large Wall Tents

Wall tents can be canvas or conventional nylon/polyester. They have straight walls and are generally larger. Barebones makes a nylon polyester wall tent. Often this type has more weather poofing and will have flame retardants because they are set up for wood-burning stores.

This can be a good solution for a longer-term camping tent. Though you should take care to keep the base dry (cut out or raised up) if you want it to last.

How to Stay Dry and Prevent Mold when Camping

How to Set up Tarps Underneath and Over Tents

I bought a tarp for underneath to keep dew from getting the tent wet from below (also called a footprint), and later I added a tarp for over the tent to stay dry.

At first, the bottom of my tent stayed nice and dry with the tarp underneath. I would take out and turn over the sleeping mat every day.

If the bottom of the tent gets wet you will want to dry it in the sun within 24 hours (flip it and then put it back and maybe move spots).

You can use the footprints made for underneath tents but tarps are generally cheaper (your tent may come with a footprint).

You want the tarp underneath to be a little smaller and tucked in so that it is under the tent. No water should get between the two. Some people tuck it and then raise it a little with sticks or rocks so that no water gets in between. I tried that but in the end tent bottoms still went moldy on me if I had damp soil.

Putting a tarp overtop helped a lot. I found regular tarps from the hardware store has a strong smell but offgassed within a few days.

I now use a silnylon tarp which has a less offensive odor, and is more durable but is more expensive. Over most tents, you need 12 x 10 or 12 x 12.

Some people find they still do have to move the tent every couple of days due to condensation or the earth going funky underneath.

A blue tarp strong up between two trees over my orange tent.
One of my many tarp setups CC BY-NC-SA

Mold Avoiders! Keep a backup tent that is offgassed in case of mold or damage to your primary tent. Keep backup gear especially if you are out in the wilderness, if you need geat to offgas before using, or you cannot easily drive somewhere and buy new gear within one day.

Generally, you string up the tarp up in an “A shape” so that it’s touching neither the tent nor the ground, you can also string it up with a shed slant like the photo above.

Some people dig a small trench around so that the water that drips off does not go towards the tent.

Without a tarp, I had a lot of problems including saturation of the tent and water coming through especially where anything was touching the tent. I would not attempt camping without a tarp overhead again.

In a major storm, a larger tarp overhead helps, as well as a deep trench, and if things are going swampy you need to raise it up. I have used XPS sheets to raise up a tent in a storm before I found the Cot Tents.

The Solution to Tent Bottoms Going Moldy – The Best Tents For Avoiding Mold

A blue tarp strung up on an angle between trees over my cot tent
The Ozark Trail Cot Tent CC BY-NC-SA

After throwing out many tents and then moving on to cutting out the bottoms, I finally found what seems like the perfect tent: the Ozark Trail Two-Person Cot Tent. Unfortunately, it looks like it was discontinued in 2020.

This style of integrated camping cot tent (pictured) is really the most ideal setup in my experience This is off the ground so the bottom will not mold.

This had a very low odor rainfly and a brilliant design with the rainfly coming down way past the cot to protect water from getting in between.

Although I didn’t like the more common style of tent cot (I had trouble with ventilation and even dangerously spiked my C02 levels one night).

A small cot tent for one person

It was the Kamp Rite brand that I tried in this style. The Camp Rite brand does have a two-person version.

I quite like the Tenton tent that is made to strap on to their XXL camping cots.

You will, as always, want a tarp over this whole setup since this rainfly does not come past the cot (though on their website they sell a larger rainfly which would).

These cot tent brands are coming and going. I’m not sure if it’s a lack of demand which is a shame because for mold prevention these are ideal.

Other Raised off the Ground Tents

The tree tents look interesting, as they are raised off the ground, but you have to keep in mind these are really just for sleeping as they don’t look very conducive to hanging out all day. I wonder how much they sag in the middle, and they are not as easy to put up.

For those who are less picky about their sleeping environment resembling a regular bed, the hammocks with nets are interesting options that are affordable and easy to travel with.

Downsides of Cot Tents

Cot Tents are Bulky

While I would never want to go with anything other than the raised off the ground tent again, this won’t work when I travel overseas. When I travel I need to fit a tent, sleeping mat, and sleeping bag into a duffel bag.

The sleeping mats I use are huge and unless I can send a tent ahead I would have to go back to cutting out the bottom. I would use plastic bags to encase the sleeping mat, instead of the thick tarps I mention.

Cot Tents are Colder

It is cooler when you are raised off the ground. But I don’t find it any worse than cutting out a bottom and using a camping cot (in fact I find it warmer than tents with the bottom cut out).

Flame Retardants

Ozark is a very tolerable brand for MCS. I don’t like the flame retardants they use. I have not seen a flame retardant free brand in this style.

Should you Buy a Cheap Tent or Tent that Lasts?

For those doing mold avoidance or living somewhere very damp, you might want to go with the more disposable option.

Expensive tents from REI and MEC tend to pack smaller and lighter and should be of higher quality, however, if they do go moldy it is a bigger loss.

On the other hand, if I am traveling with a tent I want one that’s not going to break unexpectedly as many places around the world do not have stores that sell tents. Check also how much wind and rain they say they can withstand. You pay more for quality wind and rain protection.

But all of that said, I would never spend more than 150 on a tent unless I’m sure it’s going to last me a long time (like the ones raised off the ground).

Camping Mats – Low Offgassing 

Air Mattress

A turquise air mattress made of TPU

I started with the Lightspeed air mattress made of TPU, which is the one the folks most sensitive to chemicals use.

It offgassed quickly (2 days in the sun) and felt comfortable. It’s good quality, but I had back problems with it. This can happen to some people on air mattresses.

Many with chemical sensitivities prefer the Intex polyester air mattresses.

Inflatable Sleeping Mats

a beigh inflatable camping mat

Other very sensitive folks have tolerated the small air mats. I was very impressed with how little this one smelled (less than the air mattress), and it’s a WAY better option to travel with, but I did not find it comfortable enough.

Someone much more sensitive than me recommended the Klymit Static v which comes uninsulated and insulated (with what looks like polyester fiber, not foam).

Go with the simplest, most compact option that is still comfortable for you.

Open Cell Foam Self Inflating

A mondo king thermarest (blue)
The Mondo King

I ended up buying the thickest Thermarest instead and LOVING it. This is as comfortable as a bed to me, though many people put Thermarests over a camping cot, that seemed excessive with the MondoKing (though cots can also help you get off the ground which is a benefit when you have cut out the bottom or are preventing mold under the bed).

Iโ€™m not that picky about beds so I was surprised that the airbed hurt. The Thermarest has a decent R-value to keep you warm, the more insulation you have under you in the cold the better.

The MondoKing is very comfortable and I usually wake up forgetting Iโ€™m in a tent. It has polyurethane in it but it offgassed quickly in my experience. I used it after 2 days of airing out (not ideal), in one week I found it to be really good, and one month to be near odorless to me.

This is a super good mat for a trailer or other tiny home as well. It does not contain flame retardants.

I bought the repair kit for the Thermarest as well because this is going to be my main bed in the trailer, I also carry the repair kit when traveling.

I still prefer the MondoKing, but another good and more affordable (but thinner option) I use is the Lightspeed version.

Camping Beds and Moisture

When it was hot and sunny (and I was not self-contaminating) I had no problems with condensation if I turned it every couple of days and some days left it standing up to air out.

You will want to flip or air out your sleeping bag as well in the day to prevent mold.

As it got cold and I moved it into a trailer it became very challenging to keep a sleeping pad dry and mold-free. It needs to have slats underneath and a waterproof cover without a doubt in a cold or damp environment.

I wouldn’t recommend leaving this on any flat surface without a waterproof cover anymore. As I got more sensitive I was not able to keep this clean without an encasement.

If you are very sensitive to mold, very unmasked, or detoxing through your sweat, encase the sleeping mat right away. You can use plastic but I prefer these thick aluminized tarps as they also block the smell.

I used those tarps if I needed to block the smell but if I just needed to encase it I used contractor bags that are thicker than the usual garbage bags. I taped it airtight.

Closed Cell Foam Pads

a closed cell camping mat with silver on one side

For those ultra-sensitive to chemicals, an aluminized Thermarest is the safest camping mat.

People usually go with the solid foam or the small inflatable ones as they pack much smaller than the deluxe one I bought (and these are more affordable). They offgas less as well.

You can wash these unlike many of the other options. Some even pour boiling water on them to clean them and kill bacteria. You can’t do that with all camping mats.

Camping Cots

I like this style of camping cot the best because it packs really small, it is relatively flat, works well with a Thermarest over it, and it’s low to the ground but high enough to have airflow.

I never put a camping mat straight on the ground anymore. I always want that airflow under the sleeping mat (if you are not using an integrated cot tent).

I would not say this style of camping cot is easy to take apart and put back if you are physically disabled.

The Coleman polyester camping cots do not have a water-resistant coating so they may be safer for the very sensitive.

Bedding – Low Offgassing

Sleeping Bags

I’m extremely pleased with this Teton sleeping bag which is warm and offgassed after sitting in the sun for a week or so. I never even washed it.

I used this in the summer and some days it was too warm.

Many who are super sensitive to mold and chemicals use the Suisse Sport Alpine sleeping bag.

Sleeping Bag Liners

Others like a silk sleeping bag liner which keeps you warm and keeps your sleeping bag cleaner. It is much easier to wash a liner than the sleeping bag. I’m using this silk one and it’s quick to dry (surprised by how chemically it smelled, needed more washes than most fabrics).

You can also make a liner by sewing a queen flat sheet in half. You can either use a liner to get inside of first or to encase a blanket. This will keep the sleeping bag good for longer. The polyester liners can work too.

Blankets instead of sleeping bags

In warmer weather, I skipped sleeping bags and used heated blankets as my only blanket. As I started to detox through my sweat things got trickier.

Now I like a warm but washable option like these Pendleton Blankets. But, when it is very cold, a sleeping bag is really the warmest option.

Sheets

I use these AmazonBasics polyester sheets. But there are specific sheets for Thermarests and other brands of sleeping mats. They are also polyester, the only difference is they are fitted exactly for the Thermarest.

You donโ€™t want any cotton in your tent – it doesnโ€™t do well outside for long if it’s humid, and it’s terrible when wet.

Pillows

I bought a polyester camping pillow which is small (and it has cotton on the outside!)

I use waterproof pillowcases to prevent mold which I aired out and washed before using. They do smell at first, but polyurethane coating does offgas (to most people’s standards).

I have tried lots of camping pillows from the air and foam ones to the polyester ones, to just using a towel.

Someone super sensitive recommended the inflatable Klymit Pillow X.

You have to figure out which is the most comfortable for you. Some are very small. The air ones can be easy to roll off of. A towel is easy to wash if you need to wash gear often.

I keep backups of everything.

Staying Warm and Cool

Heated Blankets

I use a heating blanket in almost every climate. I thought the biggest problem for me would be stabilizing my temperature, but that ended up not being that difficult at all.

This is the Sunbeam heating blanket I use. After going through a lot of these, the trick is I want one big enough to cover me and I want the 10-hour shut off not the 3-hour shut-off, to keep me warm all night.

They are challenging in how strong they smell when new and since they can’t go in a dryer they can be difficult to clean in cold weather camping.

I encase my current one in these liners and wash the liner every 3 days.

For those concerned about EMFs, you can use this to heat the tent without putting it on your body. It wonโ€™t be as warm, but it is likely safer than a stand-alone heater in a tent. Or, the fancier and supposedly healthier option is an infrared mat.

This 60-watt heated blanket (the smaller throw size) will run for most of the night off this solar kit. I always have an extension cord running to my tent. A small heated blanket tucked into a sleeping bag provides a lot of warmth.

Using a Heater in a Tent

I have set up many a small heater in a tent. I check the wattage and if it has temperature control (I make sure my tent is big enough, note: read the tent dimensions carefully, they run small).

It’s safer to place the heater up on a small table or round of wood to keep it from knocking over or blowing directly onto something that could melt or burn. I make sure my tent is big enough to accommodate a heater with lots of space around it and it has an auto shut off when it falls over.

I use this little Honeywell heater because it’s super low wattage (250 watts).

I find it easy to accidentally shove this when sleeping and it can turn towards the tent fabric easily. That is just one reason why this is not technically recommended. It is a fire risk. This is what I have done, but I cannot officially recommend it.

If my tent is on the ground and I have a thick Thermarest, I can be warm enough with a heated blanket and that little heater down to 5 degrees C. I don’t sleep well when I’m cold, but everyone is different, so you will have to work out those details.

Other Heating Options

  1. Hot water bottles can be put inside the sleeping bag at night. This thermoplastic one has been reported to be very tolerable by many.
  2. Hand warmers work well when you don’t have electricity. Hand warmers in your sleeping bag can be a big help. The same company also makes sock liners. I have used these in power outages, they seem totally non-toxic.
  3. Heated clothes like battery-powered heated jackets, socks, and gloves can be a huge help as well.
  4. Wood stoves are used by some. I’m getting the Cubic Mini for the cargo trailer but I do not have experience setting up a wood stove in a tent.

Cooling a Tent: AC in a tent 

For the AC you will need to cut a hole for the exhaust and seal with tape around it.

If I put anything electrical in a tent I make sure I have multiple layers of protection from getting wet from above or flooding from below.

Use heaters, heating blankets AC, or woodstoves at your own risk of fire or electrocution. They are not recommended for tents.

Here is the longer version of my Amazon visual list of my Favorite & my Unusual Camping supplies I bring with me on a Sabbatical.

(See the comment box on each image to see my notes on each one).

A few examples here:

  • Pressure Cooker: I cooked everything in an Instant Pot when camping which I could do on my one extension cord.
  • Water Filter: Travel Berkey is still on my wish list, this ceramic filter is ideal for well water or any other water where filtering for biological pathogens is the priority (otherwise I buy water).
  • Towel: Non-cotton fast drying travel towel, I use this one.
  • Earplugs: For really loud situations the “triple down” method of foamย + siliconeย + ear protectors (or noise-canceling headphones). The construction ear protectors do smell quite strong. One benefit of noise-canceling headphones is some noises cannot be blocked without adding white noise.
  • Eyemask: The foam contoured eye masks smell a little and need some time to offgas (I put them in the sun). It is still my favorite mask many years later. The fabric ones can be washed to remove chemical treatments. I always keep a backup mask.
  • Clothes Dryer: I still love this portableย dryer, I got a tonne of use out of that. I used it outside with an extension cord, undercover. If you are in an RV a heated towel rack makes a good indoor dryer.
  • Clothes: Washable wool or silk long underwear, wool socks, and wool hat, gloves to stay warm in cold weather.
  • Hand Sanitizer: Hand sanitizerย (that’s my favorite non-toxic brand) and baby wipes are essential in a tent (unscented of course, for yourself and also if there are bears around).

More Resources:

  • My guide to a mold sabbatical
  • Avoiding flame retardants
  • EI Wellspring Safer Camping – How to choose a campsite with extreme MCS

Corinne Segura is a Building Biologist Practitioner with 7 years of experience helping others create healthy homes.

I spent 2 years living outside in tents in order to bring down my chemical and mold sensitivities and get back into regular housing.

Did you find this post helpful? If so you can buy me a coffee to support the research behind this blog. Thank you!

Buy Me a Coffee at ko-fi.com

Filed Under: Mold Avoidance Paradigm, Tiny Homes and Trailers Tagged With: camping, mold avoidance paradigm

Campsites in the Caribbean (A Complete List)

January 3, 2021 by Corinne 2 Comments

It’s oddly difficult to find campsites in the Caribbean by Googling. Though not the most popular camping destination in the world, I did find with a lot of digging, a good number of proper campsites where you can pitch a tent.

The focus is on both dedicated and unofficial campsites where you can bring your own tent. Many of the same spots also have tents that you can rent.

I did not include glamping in this post. I plan to do a separate post on glamping in the Caribbean.

This post contains affiliate links. Upon purchase, I earn a small commission at no extra cost to you.

Alternative Places to Camp

Camp in a Yard

Of course, you don’t have to have a dedicated campsite to camp. In some countries, it’s perfectly acceptable to camp in a yard, on a balcony or roof.

I did that in Cuba, a country that does not have any official campsites. I set up my casita de campaรฑa in all sorts of places at BnBs.

You can do this just about anywhere, especially if you rent a yard that is big enough to stealth camp.

WWOOFING

WWOOFING is a work trade website. You can find farms or ecovillages where you can volunteer your time in exchange for usually a free stay (lodging and usually food too).

Very often the lodging provided is a spot to tent camp.

The labour required is most often physical labour, but it can be administrative labour too.

I have also contacted many farms (both WWOOFING and other private organic farms) to ask them if I can pay a monthly fee to camp there – many said yes.

HipCamp and AirBnB

HipCamp is a site offering private spots to camp, and since the pandemic Airbnb hosts have listed more private properties on which you can camp.

If you are new to AirBnB this is a discount link for $40 USD or 75 CAD off.

You can get $10 off Hipcamp with this link.

The Locations Effect

For those following the Locations Effect Paradigm, you have to analyze these campsite by campsite. We cannot generalize on a whole country, though there are some islands that are so small that it may make sense to generalize. We don’t have reports from every country/area, though I give my true thoughts on these areas at the bottom of the article.

What you NEED to know before heading to the Caribbean to camp!

  1. Confirm everything – if they are open, what are the rates, do they have wifi, etc. before going with the campsite! Things could change between asking and when you get there too! Don’t depend on the website being accurate. Everything is less official in the Caribbean.
  2. Flexibility on where you can camp – Along with changes for the worse, you are also likely to find flexibility with camping at places that offer simple cabins or anywhere not too formal. Just ask!
  3. Ask for direct pricing (not through the hotel booking apps).
  4. You can’t buy camping gear in most of these areas (though many sites rent it out). Come prepared!
  5. There is a lot you need to know! Get the Lonely Planet book for each country you are considering and do your research. It’s a must! Things are different than in The West/Global North.
  6. If you have environmental sensitivities there is even more you need to know and you can find yourself with very unwelcome surprises like toxic seaweed, excessive charcoal campfires, moldy tents, parasites in food and water…….. my post on traveling with sensitivities covers this.

Campsites in Puerto Rico

Isla De Mona, Puerto Rico
Photo by Ricardo Torres on Unsplas

Because Puerto Rico is an American Territory it has more campsite options than most islands in the Caribbean.

You can also buy camping gear locally, something that cannot be said in most parts of the Caribbean – they have Walmart, Kmart, Sears, Sams, and Costco.

They also are the only island I know of with RV parks.

Government Campsites in PR are closed during the second wave of the pandemic, but they will reopen in 2021.

There are 11 private campsites on HipCamp for Puerto Rico ranging from $12-200 a night.

1. Vieques Island

There is a campsite on Sun Bay Vieques, a beautiful island off the south coast of the big island, in a National Park (Compaรฑรญa De Parques Nacionales).

The campsite has a cafe for food and drinks. Tent sites are in a flat, grassy, fenced area just off the beach.

The campsite has bathrooms and outdoor showers. They have security overnight.

$10 per night per site.

2. Culebra Island

The only campground on Culebra is the right on Playa Flamenco. It is managed by the Department of Natural and Environmental Resources.

This spot looks quite pristine and the beaches are really pretty.

$30 per tent per night. ($20 for senior citizens and people with disabilities).

3. Caguas

Mi Casa Eco Camping is a private camping “resort” inland in central PR. They have tents set up that you can rent.

They have bathrooms, showers, a shared kitchen, wifi, and community activities.

This is a well set up place to camp and I like all the communal activities.

$25 a night.

4. El Yunque National Forest

El Yunque National Forest a USDA Forest Service park has dispersed and group camping sites. Camping is permitted at designated campsites only.

Campfires are only permitted at Molindero and Old Nursery, in designated fire rings. Cookstoves fueled by butane or propane are permitted.

There is limited cellular service in the forest (don’t count on it working), and there are no washrooms.

Some have reported very difficult camping conditions (like severe mud).

Camping is free, but you do need a permit. There are stay limits.

5. Seven Seas Beach in Fajardo

The calm water turquoise Seven Seas Beach allows camping and has washrooms and showers.

The beach has shelters and camping spots (you need a permit prior to arrival). The local police act as security for the beach.

Call first for sure to check up on if they are in operation.

$10 a night.

6. The Toro Negro Forest Reserve

A State Forest, Toro Negro offers camping.

You can only get here in your own rental car and you need to make prior reservations. You can get a permit in the capital city.

Camping facilities include bathrooms and waste disposal.

$4 a night.

7. Isla de Mona

You can also check for WOOFING and other volunteer opportunities where you can camp like Las Maria’s Project Farm on Isla de Mona.

Campsites in Mexico

Tulum, Mexico
Photo by Tanja Cotoaga on Unsplash

1. Holbox Island

Balam Eco Camping is a cute little campsite with spots to pitch a tent and little simple cabins. They have shared space like picnic tables, an outdoor kitchen, and simple bathrooms.

On google listings it is showing that they do have wifi.

It’s not clear if the rates are for renting a tent or for bringing your own tent.

$10 a night for one person (as indicated on booking.com)

One Love Camp is another nearby campsite, very similar to Balam Eco Camping. They have tents for rent and I would think that you can bring your own too.

They have little basic cabins, shared kitchenette and shared bathrooms.

Aldea Camping like the two above has tents to rent and little cabins as well as shared spaces. This one is very close to the beach.

Kin Camping is similar to the others. This site has tents already set up, it doesn’t look like they have space for extra tents.

Glamping Holbox sunset, similar to the others but reviews say it’s particularly loud. (All of these packed in campsites in Mexico should be assumed to be fairly noisy at best).

Message them for the prices. (All these spots on Holbox are probably similarly priced).

2. Yucatan

Just across the water from Holbox on the mainland is a campsite Camping del Ritmo.

A site close to the beach. They have a campfire area, shade palapas that you can put your tent under, a well-equipped kitchen with 2 bathrooms, hammocks, tables and chairs, and wi.fi.

Contact them for the costs and for booking.

3. Cancun

There is a full-service RV park west of Cancun if you are traveling in a van or RV. It’s a basic site, but they offer full hook-ups, wifi, a small pool, restaurant, cabins and it seems tent sites as well, an outdoor grill, simple dishwashing area.

The rates are not listed.

4. Xpu-Ha, North of Tulum

North of Tulum in Xpu-Ha there is a full service RV park. It’s also possible to camp on the beach there.

For full hook ups it’s 15 USD a night. Contact them for tent camping costs.

5. Tulum, Playa Roca

If you want to camp right next to the beach, Playa Roca is a good spot. This is a lot more spacious than the sites on Holbox, but it is simple.

It is quieter than the spots on Holbox too which are quite packed. At this site you can definitely bring your own tent, though they do rent them out as well.

They have shared showers and bathrooms and a kitchen. There is no electricity and no wifi.

100 pesos per person per night ($5 US)

Arena camping next door sounds like they share the bathrooms with Playa Roca and they don’t have their own kitchen. Though they do have large tents that are already set up for you to rent.

Rates are not listed.

6. Tulum, Camping Chavez

Camping Chavez south of town is a great spot to camp on the beach. A little more established than the other sites they have a shared outdoor kitchen, bathrooms with hot showers, and electricity in the common areas. The little shelters, and cabanas that look very simple and clean to me. They also have wifi!

Booking.com is showing the price at 37 USD for a single tent (which looks like renting their tents and bedding).

7. South Tulum, Sian Ka’an Ecological Reserve

Lastly, a bit of a hidden gem, El รบltimo Maya, is remote, secluded, and beautiful. It’s within a nature reserve so you can expect to get away from the usual pollution in Tulum.

Personally (for the Locations Effect) I would want to get out of Tulum.

They don’t have a website and there isn’t a tonne of info on them but the photos are beautiful and you can camp there. There is a restaurant, showers, and bathrooms.

Reviews say they do not have electricity.

You can’t cook your own food here so you would be relying on their restaurant which sounds pricey (at least some items). One reviewer says it costs 50 pesos for cold beer, 35 pesos for soft drinks, and 250-300 pesos for a meal.

No bonfires are allowed.

350 pesos a night (around 18 USD) if you bring your own tent.

8. Mahahual (Southern Caribbean Coast)

Eco Camping La Mar is a sweet little campsite in this more remote area.

They use solar energy and collect rainwater. There is a common kitchen in a concrete building, storage area, and bathrooms.

They have a little cabin but most spots are tent spots.

They are not taking bookings as of winter 2020/21, but check back post pandemic.

Further south there is another campsite called El Xahuayxol. Their website is also down but they do have very recent reviews. Contact them for more info and rates.

It was listed on Booking.com as 25$ a night.

9. Lake Bacalar (Southern Mexico)

There are number of campsites in this area including Gris Monkey campground in Xul-Ha, Ecocamping Yaxche, DelMar Camping, Camping Bacalar/Magic Bacalar.

At Magic Bacalar they have cabins and tent spots. You can rent camping gear or bring your own.

This is a well developed site with common spaces, palapas, a kitchen, lockers and wifi.

If you bring your own tent it’s 180 pesos per night. (Currently that’s 9 USD)

What to Know About Mexico:

  • It’s best to know some Spanish outside of high tourist areas.
  • Life is more flexible, be sure to confirm all the details with the site first. You can bargain on rates.
  • Look into health (food and water can make you sick) , mosquito-borne illness and COVID restrictions, sourcing specialty foods and medications, MCS triggers like pesticide spraying, charcoal grills, sargassum seaweed, and garbage burning. You can’t import supplements to Mex.
  • The Lonely Planet has a main Mexico book and one for the Yucatan.

HipCamp has 3 sites in Mexico starting from $2 a night.

Campsites in Belize

A Caye in Belize
Photo by Nathan Shurr on Unsplash

1. Sarteneja Village, Northern Belize

Backpackers Paradise is a cool organic farm with some great little cabins, a communal kitchen, wifi, lockers, and a communal room with hammocks.

I think this spot looks lovely.

You can bring your own tent to camp or rent a little cabin.

It’s a 5 minute walk from the ocean, and is very close to the border with Mexico.

If you are new to AirBnB this is a discount link for $40 USD or 75 CAD off.

Camping is listed at 10 USD.

2. South Water Caye (45 min off the Mainland)

Private island alert! Bamboo Belize is on it’s own 15-acre caye. While you don’t get the island to yourself (unless you are a party of 12), it’s still pretty cool.

A fairly remote island, there is no wifi, no hot water, they say to bring solar chargers.

Camping is 25 USD a night.

3. Saddle Caye South

Another private island! Kayak Belize operates off Saddle Caye South. They can arrange for camping on other islands.

While clearly this is focused on kayaking they do offer campsites for tents.

Camping with no gear rental is $5 per night. Be sure to check in on other charges.

Those are the Belize campsites that are on the Caribbean sea. There are other campsites in the jungle as well like Chateau De Pradines, and quite a few others that don’t have much of an online presence. Belize is a good country to find little simple cabins for rent.

What to Know about Belize:

English is the main language in Belize.

It’s more expensive than Mexico and Guatemala.

Be sure to look out for the same safety and illness concerns as in Mexico.

Belize City is notorious for crime, but if you’re reading this you already probably wanted to get out of there asap.

Campsites in USVI

St John, US Virgin Islands
Photo via campstjohn.com

1. St John Camp

On St John island in the US Virgin Islands, Camp St John is a beautiful campground up the hill looking over Caneel Bay.

The campground has a community power source, bathrooms with running water, an outdoor camp shower (not heated) stocked with toiletries, a stocked coffee station, an electric griddle, silverware, and dishwashing supplies, potable water, and a cooler for community use.

This is USVI, nothing there is going to be cheap. But if you want an American Territory and a more economically developed island (and everything that comes with that from less disease to safety) this is the cost of that.

$55 per night if you bring your own tent.

2. Cinnamon Bay Resort & Campground, St John

In St John, this campsite is still be rebuilt from the last hurricane (as of winter 2021).

They used to offer simple cabins and tent spots.

They plan to reopen at the end of 2021.

3. Mt Victory Camp on St Croix

An 8 min drive up the hill from Rainbow beach is Mt Victory Eco Camp. They offer bungalows and tent camping.

For the tent camping option, you bring your own gear. Tent sites are in the open air and within the forest.

Campers can have access to open-air showers (with hot water), bathrooms, an outdoor kitchen with a fridge, gas stove, sink, dishes, and cookware, outdoor areas like a campfire pit and shaded picnic tables.

Wifi is available (and included in the price).

They also offer workshops that look interesting.

$30 per night

This US territory has three main islands – St John, St Thomas, and St Croix.

There isn’t much camping in the USVI so don’t count on having many backup options.

If you want a safer location and are willing to pay more, this is one of the only more upscale islands with camping.

Apart from the options above, there is one camping spot (with no amenities) on HipCamp.

You will see the options above plus a couple other options on Airbnb.

Campsites in The Dominican Republic

Samana, Dominican Republic
Photo by Jean Estrella on Unsplash

1. Barahona (South Coast)

Near Barahona, there is a campsite for surfers called Camping surf Bahoruco. They don’t have a website but they do list a phone number. Use Whatsapp to message them.

2. Jaragua National Park (South Coast)

This national park nature reserve has an exceptional true turquoise beach. This is likely the most spectacular beach that you can camp on in the Caribbean.

There isn’t much official information about camping there but many photos and google reviews of folks camping there.

I imagine there are no services, this is camping in the wild. They have a phone number.

The prices (and stay limits) are not clear but one reviewer said it’s $3.

3. Close to Jaragua

If you need to escape to somewhere more comfortable close by, Glamping Cueva De Las รguilas is near the national park.

They only have tents that are already set up, and this makes it a much pricier option than most campsites.

The tents have electrical outlets, washrooms are shared, there is a restaurant (you can’t cook your own food). It doesn’t say if they have wifi but I would expect so.

$53 per night for the least expensive tent.

3. Parque Nacional Francis Caamaรฑo

Further east on the south coast towards the capital, Francis Caamaรฑo National Park does appear to have campsites but there is no further information online.

Call them, contact local people or check guide books for more info.

4. Samana (North Coast)

This is a thatched dome that is already set up on a 4 acre mountain property in Samama overlooking the ocean. Just 5-10 minutes from Playa Coson.

You get the property to yourself other than the owners who live downhill.

There is a camping toilet as well as a outdoor camping shower. No kitchen. There is electricity for charging your devices and for lights inside the dome. There is cell service. Wifi is available only down near the owner’s house.

If you are new to AirBnB this is a discount link for $40 USD or 75 CAD off.

$33 USD a night.

5. West of Semana on the North Coast

There are a couple of other sites on the north coast that might have camping but it’s not very clear and they don’t have websites. Afuera Camping Club, and River and Woods (which isn’t that close to the beach) are two. You would have to contact them to see what they offer.

6. In the Interior Forest

There is a campsite at Spirit Mountain, an organic coffee farm in the interior of the country. It’s secluded and beautiful.

It has a few shelters, outhouses, potable water, sleeping pergolas, and a kitchen with a wood-fired bread oven.

It looks like the pandemic might have been a hit to this campsite but you should contact them to find out if you can still camp there.

There are a lot of similarities to Mexico here.

Spanish is needed outsidee of tourist areas.

The DR is a very popular tourist destination, tourist and expat areas are weell developed, that means you can find many of your North American products.

Unlike Mexico you can import supplements.

Campsites in The Bahamas

The Sivananda Ashram Yoga Retreat, Paradise Island, Bahamas

The Bahamas don’t have any official campgrounds and you can’t camp on public land but one place you can camp is at a yoga retreat.

Ashram Yoga Retreat, Paradise Island

The Yoga Vacation program is included in their all-inclusive accommodation rates.

This includes vegetarian meals, yoga classes, satsangs, and daily workshops, as well as access to the beautiful beach, ashram grounds and amenities like shared washrooms.

For tent space only: bring your own tent, bedding, and towels.

$65 a night for the tent camping rate.

Campsites in Antigua and Barbuda

Rendezvous Bay Beach
Photo via https://rendezvousbay.com

1. Rendezvous Bay Beach, Antigua

Not an official campsite, Rendezvous bay is part private estate (under development) and part of the Antigua and Barbuda National park.

The 330-acre park is difficult to access either by a long hike or 4 wheel drive vehicle, but it sounds like it’s well worth it.

Locals camp here and there are a few other mentions of camping here. You should connect with the National Park or local people to find out the rules and norms before camping here.

There are no services at the park for camping, but as you can see from the above photo it’s beautiful and looks pristine.

I do not believe there is a fee to enter.

2. Frangipani, Barbuda

This camping and glamping site has one little cabin and spots to tent camp.

You can bring your own tent or rent equipment there (tents, camp beds, ice box, and sheets).

The site has running water and an outdoor toilet.

They have reopened after the pandemic shut down.

Message them for rates.

Campsites in Jamaica

Holywell Park Jamaica blueandjohncrowmountains.org

Holywell Park

In the highlands of Jamaica, Holywell Park is part of the Blue and John Crow Mountains National Park.

Campsites feature BBQ grills, water, shower and toilet facilities. You can bring your own tent or rent one of theirs.

At this higher elevation you will have more pleasant temperatures.

$10 per night

Campsites in Barbados

Barbados campsites, photo via http://campingbarbados.com

Camping Barbados

Camping Barbados operates 3 campsites throughout the island.

They operate one campsite on the south coast near Silver Sands, one in a tropical forest site in the heart of Barbados (St Thomas), and one east coast site near Tent Bay.

They also have urban camping spots around the island, ideal for solo travelers and small groups.

All but their Tent Bay site have a live-in host on the property.

You can bring your own tent, rent a ready pitched one, or rent a tent to use off site. 

Their pandemic discount is excellent. If you bring your own tent the rate is $5.00 US per person per night.

Sites with private bathrooms available. They have on-site security and 24/7 on-site personnel. Meal plans are available.

$5 per night during the pandemic

Campsites in Guadeloupe

Guadeloupe Photo via Hamac Camp

Hamac Camp

Hamac Camp Guadeloupe is five minutes up the hill from the beach La plage de Malendure. This place looks so cool!

They provide the little shelters that have hammocks, duvets, and sheets and tables, and chairs.

They also have a little stove, dishes, and coffee maker.

Shared spaces include a campfire area, outdoor toilets and showers.

This is a French overseas territory.

25 Euros per night

St Maartin and Panama camping coming soon!

The Locations Effect

It’s hard to summarise the location effect by country here because we have limited reports especially from experienced avoiders who generally prefer to stick to the US.

But I’m going to try to summarise:

PR

We have some good reports from the islands off the south east coast of puerto rico. Buildings in PR are especially bad for the region though, leaving back up options very very slim.

The DR

We don’t have reports from unmasked avoiders, but we do have some good reports. A fairly large country I definitely expect some good locations here. The campsite in the nature reserve looks wonderful though not practical.

Mex

We have the most reports from Mexico. I feel very confident in saying that the Caribbean coast of Mexico is so-so (esp around the tourist areas). With a few people making substantial recoveries but those unmasked having a hard go at it, I feel quite sure of this being so-so. (Also, I’ve been there). Mexico is a large country though and I don’t think we have any reports from the more remote areas.

Barbados

We do have one bad report from Barbados and personally, I don’t think there would be many good locations there.

Now based only on factors from other countries and my intuitive approach to locations:

Guadeloupe looks like it could be really amazing; the beach in the nature reserve in Antigua looks wonderful; I like the little communal site in northern Belize but the rest of the country I’m pretty wary of.

I think USVI might be better than we think, but I’m not sure. I think if someone has the money and wants the safety and lack of disease (mosquitos, parasites) it could be very worth it. Many of the mountain campsites in the jungles look good to me. There is one is the DR. I’m not sure about the others.

Buy Me a Coffee at ko-fi.com

Did you find this post helpful? If so you canย buy me a coffeeย to support the research behind this blog. Thank you!

Filed Under: Mold Avoidance Paradigm Tagged With: camping, mold avoidance paradigm

Passive House Tiny House – A Detailed Mold Preventative Build

December 4, 2020 by Corinne 15 Comments

Intro from Corinne

What it takes to Build a Mold-Preventative House

This post is about a meticulously built tiny home, designed to hold up in the long run to mold.

The post is written by the owner/builder who did years of research and consulted with many building science experts.

There was an extreme attention to detail on preventing mold.

The main reason almost every house is moldy is because of the many mistakes made in both design and execution.

These mistakes can be even more prevalent in tiny homes – which are less regulated and often built by non-experts.

This post serves as an example of the care, research, consultation, and attention needed to build a tiny house that will hold up to mold. There is no other article like this online nor in books so I’m very grateful to Terran!

The owner/builder, Terran, also has TILT (also known as chemical sensitivity). There is a focus on healthy materials in the build as well as mold prevention.

This post may have ideas you can use in your own build and it is also interesting to see the kind of detail needed to carefully build a house.

The build itself took over a year.

This house uses many practices from Passive House building so there are some unique aspects, but many of these designs can be applied to most tiny houses.

Never simply copy someone elseโ€™s building practices without consulting with your own architect or engineer who specializes in mold prevention. If you change the materials due to availability, or your own sensitivities, or you live in a different climate your house will likely be different.

Any ideas here should be reviewed by you and your experts. That is not a legal disclaimer, that is just what needs to be done to build a home that will last. 

This post does not go over every detail of the build, as that would take a whole book. But it does cover the main tricky areas and how they problem solved for mold-prone areas, as well as the main materials used.

Even if you choose just to look at the pictures, this will be interesting to anyone looking to build a safe and healthy tiny house.

Whether you are a beginner who does not know the full complexity of housing systems or a contractor this post has new ideas presented in detail.

I am very excited about this post. I think it adds something really important to the tiny house conversation.

The following is written by Terran and has a few comments inserted by me. It has been edited for grammar and length by me. The owner himself will be away from the internet for 3 years from the date that this was first posted. His personal website is here.

This post is not sponsored by any of the companies mentioned. Some products mentioned have affiliate programs. Upon purchase, I earn a small commission through affiliate links at no extra cost to you.

For individual help finding a skilled builder and selecting healthy materials for you and your building system, you can contact me for a one-on-one consultation.

Enjoy,
Corinne

Intro from Terran the Builder

About three years ago I set out to build a Tiny House to help with chronic health problems Iโ€™ve had since childhood.

The structure would need to be free of chilling drafts during colder weather (it gets down to around -30 F), free of building materials that caused Toxicant-Induced Loss of Tolerance (TILT), have a good (and properly sized) supply of fresh air in the form of Heat Recovery Ventilation, and would need to be as efficient as possible.

Early on we struggled to find materials that would fill these needs. We thought it seemed likely that we would wind up building more or less another version of the kinds of structures that have made life challenging for me in the past. But then a retired contractor mentioned Passive Haus/Passive House (PH) to me.

For several months, Iโ€™ve been living in the final product of what we built, and it has changed my life. It is by far the most beneficial structure for my health that Iโ€™ve ever lived in. Because of that, I really wanted to take the time to explain our build.

Iโ€™d be really happy to know that others in the Tiny House community might be able to build on what weโ€™ve done, and improve it. Theyโ€™re awfully small spaces to share with moldy surfaces and cavities of walls, roofs, and floors that have moisture issues over time. I have heard horror stories of how much these factors can impact Tiny House occupants.

The envelope design we settled on has a number of points where it differs from other Tiny Houses Iโ€™ve seen, so Iโ€™ll try to explain why and how it differs in this post.

Iโ€™ll start with how we went about planning the design.

Part I: Design and Testing

During the early part of the planning phase, the amazing and kind Hans at Pinwheel Structures in Ontario, Canada suggested that I try using U-Wert in order to test moisture and efficiency performance of my wall, roof, and floor assembly ideas. U-Wert (German for โ€œU-Valueโ€) is a program that people can use for free online to perform basic WUFI-style analyses of any given assembly in their building envelope.

There are more advanced features available through subscription.

The English version of the program itself is still partially in German.

There are full listings of analysis information for nearly all brands and styles of Passive House Certified Materials, as well as a wide selection of the other common building materials.

The listings include factors like permeability, u-value, thermal delay, thermal mass, and nearly all the other important statistics for Passive House consideration.

Once putting together a given assembly design, one can set interior and exterior temperature and humidity to see how the assembly performs under different conditions.

Because I figured I only had one shot at getting our design right, I got a little addicted to the program.

At 475โ€™s recommendation, I also bought a copy of the Passive House Planning Package (PHPP). The PHPP was learnable, with some real attention and effort, for a layperson like myself โ€“ and the amount of climate-based information it offered was invaluable for understanding whatโ€™s required to build a Passive House.

After working with the PHPP for many hours, I was able to get a sense of how much energy Iโ€™d be using for the plan I settled on.

What I needed was a design that could be potentially mobile, was specifically designed around environmental health issues, and that fit into an incredibly small budget.

The home will also be empowered by the fact that it can be physically moved (and therefore re-oriented) each season, to give it the best performance for any particular time of year.

After more U-Wert and PHPP test-runs than I could count, we settled on a design that has a few calculated risks, largely for the sake of maximizing foam-free efficiency. I want to be sure to explain those.

Part II: Walls, Roof and Floor

Walls

The first of these risks is that instead of using a continuous layer of exterior insulation, such as Gutex (covered by battens and siding as normally prescribed) we chose to go with Facade-Grade Thermacork.

Facade Thermacork has essentially the same u-value as wood-fiber insulation, but can be left exposed to the elements for a lifetime, and is designed and tested to stand up to almost any kind of natural exposure (except woodpeckersโ€ฆit doesnโ€™t like woodpeckers! Just put up some mylar balloons when it first goes in, and theyโ€™ll stay away).

This function of Thermacork is not a risk, itโ€™s been relatively well tested in many places around the world and is undergoing some data collection in the temperate rainforest of Washington State.

(Note: In a three year update Terran has reported that there is no moisture behind the cork!).

The risk for us is that we could not find anyone who had used Thermacork on a Tiny House and then moved it on the highway.

Some of the people we spoke to about the idea seemed completely unworried about the material in highway conditions (after all, it survives extremely high winds on building exteriors all the time). Others felt we might want to plastic-wrap the house if it ever gets moved. Weโ€™re thinking weโ€™ll probably be safe and wrap it, just as most conventional mobile homes are wrapped for transportation.

This seemed like a reasonable risk to take, as weโ€™re not planning on moving the house often (only once or twice in its lifetime, if needed).

Additionally, the Thermacork allowed us to save a great deal of weight over the normal exterior insulation-batten-siding approach โ€“ no matter how we sliced or totalled different materials. Thermacork also had a major advantage for sound: one inch of it cancels as much as 50 dB equivalent.

Most importantly, though, the Thermacork saved us space.

After repeated U-Wert analyses, it became clear how important every inch used for insulation can be in a Tiny House, due to size restrictions. Tiny Houses generally need to be less than 8โ€™6โ€ total width, and less than 13โ€™ 6โ€™ total height for road legal transport in most areas.

Additionally, since we were trying our best to make sure that the structure could be certified as a legal residence (we are now nearing receipt of a Certificate of Residence or Occupancy) we had to hit the International Residential Code (IRC) requirement of 7โ€™ interior space in length and height of all habitable areas.

These factors place a clear limit on how much space there is in a Tiny Home for insulation.

A note on foam vs other insulation: under these circumstances, foam can be tempting. Itโ€™s light, it appears to have the maximum R-value per inch of all available insulations save for Vacuum Insulated Panels (VIPs). It can also come in differing forms (spray, board, roll, exterior roofing spray, etc.).

However, even the most trustworthy professionals in the foam industry I spoke with emphasized that spray foam will lose significant R-value over the course of its life.

It will be dimensionally unstable, eliminating its proposed air-sealing value, and potentially creating gaps in wall-cavities over-time. It is expensive. Almost all foam is heavily vapor-closed, and so does not allow breathing of moisture in most building assemblies like ours.

Most of it also outgases for the life of the product, and spray-foam can lead to disaster if minor aspects of the install go astray.

For more information on why we chose to avoid foam in our build, please see 475โ€™s excellent blog series โ€œFoam Fails.โ€

A final note on our framing design: it could be said that we took a risk by utilizing advanced framing techniques for a mobile design. This has become a commonplace approach among Tiny House builders, but it does require care.

The architect who volunteered to help us, John at Rebuild Studio, as well as the seasoned framer we consulted with, took every opportunity to emphasize that.

We made sure to install metal braces at pretty much every connection point (between floor and wall framing, between roof rafters and sill plates, etc.).

Our framing consultant really did want to see us use 2×6โ€™s โ€“ rather than the Tiny House standard 2×4โ€™s โ€“ and for a lot of reasons (see the โ€œInteriorโ€ section on Windows, Doors, and Interior) we decided to go with that suggestion.

Here are more pictures of the framing.

Roof

If we had anyone nearby who could do dense-pack cellulose affordably (or there was a machine we could rent nearby to do it affordably ourselves), I would have insulated the roof with cellulose to be sure we got the weight balance right.

Aside from the sheer lightness of cellulose, dense-packing cellulose or fiberglass might have also allowed us to save considerable additional weight by removing some of the secondary stick-framing we put in, in order to add additional layers of Rockwool around an interior thermal break space.

There are also fantastic cellulose batts on the market, but they would have cost us about twice as much as Rockwool (due to the fact that we can easily drive across the border into Canada and buy Rockwool near the factory).

I want to highlight this risk, because I would not want anyone else to take the same approach we did, only to find that their building is top-heavy and dangerous.

I have not taken our Tiny House on the road yet, and so I cannot confirm that it will be functionally balanced. Based on our best weight calculations, and the considerable weight of the floor assembly and heavy-duty trailer we built on, we felt like the building would be alright traveling at moderate speeds.

Here on the build site, it has never so much as swayed a millimeter. But I remain agnostic about how this aspect of our build turned out, and we may not know for many years how it will fare on the road.

(In a three-year update, Terran mentioned to me that the house has done well in very high wind storms, but has not yet been moved).

That R-60 roof value was very challenging to reach without foam, we had weight restrictions, and it required some sacrifice in space.

Many Tiny Houses really skimp as much as possible on insulation in the roof and floor, so that they can have enough space for a functional lofted living/sleeping area.

A major factor that encouraged us to go with our approach is that, due to the IRCโ€™s size requirements for habitable spaces, most Tiny House lofts are illegal for sleeping or any other habitation activity.

Knowing that, we were willing to sacrifice a loft. Instead, we made what is essentially a permanent bunk bed โ€“ and since one of the main concerns Iโ€™ve heard with Tiny Houses is closet space, we made it into an inexpensive pull-out closet.

There would have been no way to make a legal living space underneath.

We could have also gone with the approach of putting the bed underneath a platform living space, and rolling it out on casters (to see how this approach works, see the Minim House.

If I had needed a larger bed, that is most certainly how I would have done it (and I would have made sure to get an out-swing door, rather than an in-swing!)

Floor Assembly

Another aspect of our design that might require some explanation is the floor assembly. We went through a number of ideas for how to create a truly thermally broken Tiny House floor.

Along the way, we also had to face the fact that there were no known ways around using vapor-impermeable materials for the interface between the floor frame and the trailer โ€“ at least none with proven longevity.

I really wanted to be sure that the floor had vapor permeability because Iโ€™ve seen deconstructed Tiny House floors that had gone rotten after some years due to impermeability issues.

Floors, especially those elevated off the ground and exposed to air and wind, can really have a tendency to deal poorly with vapor drive. They are the coldest assembly in a Tiny House.

After some great advice from many professionals, we decided on using ยพโ€ marine-grade plywood for the underside of the floor assembly โ€“ with some added tricks and layers.

Floor Trick 1: We built the floor upside-down, in sections that we could manipulate without heavy equipment. While the marine-grade ply bottom was exposed, we taped all ply seams with Extoseal Finoc, as well as all parts of the ply that would interface with the trailer.

This not only provides a great self-sealing water-proof layer but also enables meaningful amounts of capillary action to wick away any moisture that comes between the floor-frame and the trailer in those interface spots.

Floor Trick 2: We then coated the remainder of the exposed marine-grade-ply-surface with Prosoco R-Guard Cat 5, which was extremely impressive.

As many Passive House Professionals have pointed out, relying upon liquid-applied layers for air and moisture sealing on walls and roofs can be unreliable. Many such layers can fail over time. Also, they are not produced in a factory (like Solitex Mento or Intello) and are essentially โ€œmanufacturedโ€ on site. This creates significant added potential for failure/error during application and curing.

However, in our case, we were not relying on the Cat 5 for air sealing, since we would be taping all seams by the end of the install.

What we wanted was a thick, durable protective layer over the ply surface that would completely repel water, and be moisture permeable from the interior. CAT 5 fit that description very well: itโ€™s thick, water-immune but breathable, and incredibly strong (almost like dolphin skin when wet).

Prosocoโ€™s amazing field rep emphasized that Cat 5 should always be covered and protected by rain-screens, etc., as it can definitely be damaged.

However, because our application was sheltered and downward-facing, and we were not covering the surface with siding or anything of that nature, we felt all the more confident that we would be able to patch the material over time with a brush-stroke or two anywhere it might get damaged during sitting or road-travel.

We figured weโ€™d just schedule logical times to check the surface and see if it needs repair (zero repairs needed so far).

Although the material should never be exposed directly to the sun and other elements, because we were installing on the underside of a floor-frame and taking the above precautions, Prosoco agreed that this was a feasible approach for our application.

Floor Trick 3: After a lot of consideration, we settled on putting the thermal-break layer for the floor to the interior.

Placing a thermal break to the exterior of a THOW floor frame either left significant thermal breaks (as in insulating the trailer frame), created a danger of decay (SIPS), or other problems.

Placing the continuous layer of insulation inside the building envelope allowed us to not only to ensure we had a robust thermal break but gave us the ability to build our floor sections with 2×8โ€™s (again, without heavy equipment) because we would not need to lift the added weight of wood-fiber insulation board with the sections, during placement on the trailer.

Floor Trick 4: The engineer we worked with said that we should use stainless steel bolts and nuts to be sure we had enough strength, and he gave us a pretty large number to install.

It was a really fail-proof way to ensure connection to the trailer โ€“ and will allow the Tiny House to be removed and put on another trailer or a foundation when this trailer reaches the end of its life.

Because our floor frame was so thick, we had to use an extremely long metal drill-bit meant for aircraft, but it was available locally and worked very well (with a lot of elbow grease โ€“ Kangaroo Trailers makes a seriously beefy trailer). Dave at Kangaroo was able to get us additional attachment points via welded flanges on the sides of the trailer, and very well-made cross-bars going across the center.

His design also saved significant amounts of weight over many of the other approaches weโ€™d seen โ€“ while still keeping a maximum amount of strength on the main frame and the tongue.

We had been hoping to avoid the use of sheet-goods with formaldehyde of any kind on the interior of the structure, so we used tongue and groove pine instead.

Above the pine, we installed the wood-fiber insulation, and above that, we laid Intello Plus and connected it on all junctions with the wall membranes.

This very effectively sealed the pine out of the interior living space. However, we were left with a surface that would have been difficult to install a conventional floor over (i.e. the top of wood-fiber insulation, with relative blindness to the studs and tongue & groove below).

Floor Trick 4: In the end, after a lot of research, we used Marmoleum Click for our finish floor.

Marmoleum makes the only linoleum certified by several international health organizations โ€“ and takes great care to ensure that all materials used in their products are low-off-gassing.

Running a simulation of the product in U-wert (using the top-surface, the low-VOC HDF, and bottom cork layer) tested to have acceptable vapor permeability โ€“ although we were never able to get official perm ratings from the company.

More pictures of the flooring process here. 

Part III: Air Sealing, Ventilation, and Heating

Because we wanted to avoid drafts, foster dry wall cavities, avoid the formation of mold throughout, and have good control over the interior air-quality of our Tiny House, air-sealing and ventilation were incredibly important to us.

We were extremely happy to find products that worked perfectly for these purposes and had extremely rigorous testing and research backing them.

Air Sealing

We used a carefully detailed continuous layer of Solitex Mento 1000 as our primary exterior air-sealing layer, and vapor-permeable secondary Weather Resistant Barrier (WRB).

We applied a similarly detailed interior layer of Pro Climaโ€™s Intello Plus as our interior air-sealing layer and intelligent vapor control layer.

We then applied Tescon Profil tape for all our window connections to the interior and exterior membranes (taking care to seal and connect the junctions between Mento and Intello). 

We also used Tescon Vana to seal the seams of the exterior sheathing as a back-up, to help ensure we got a good air-seal โ€“ since it was our first time around the air-sealing-block.

475 believes in redundancy, and although taping all plywood seams below a layer of Solitex Mento is not a step they suggest, we really wanted to be sure we got a proper air seal, regardless of any novice mistakes.

Along the way, we sealed all seams and penetrations of the interior and exterior membranes with Tescon Vana as well.

Extoseal Encors was used for all the window and door sill-pan details. 

Encors is able to flex and shape itself around corners in ways that are genuinely unbelievable, especially when compared to normal materials โ€“ and its self-sealing and waterproofing capabilities are essentially superpowers.

Note: 475 (and most architects) recommend applying this directly to the wood in the rough opening. However there was some disagreement among experts at the time of building.

We also wanted to experiment with trying to save vertical space by using Solitex UM on the roof.

This allowed us to save the inches of vertical space that would have otherwise been taken up with battens, while still allowing moisture from under the roof panels a pathway out from under the standing seams.

We had to take special care when lapping the drip-edges to be sure the moisture would escape on the mesh, as planned, and also had to take a lot of care while installing the roof panels over it, but we all wound up being impressed with the functionality of the membrane design.

Because we had to have some extended conversations with 475 about how to detail this particular process, and we havenโ€™t seen it elsewhere on the 475 blog, we wanted to list the steps here:

  • Install Wood-Fiber Insulation properly over the roof sheathing.
  • Properly stretch, mechanically fasten, and tape the Solitex UM over the wood-fiber insulation.
  • Make sure to properly connect the Solitex UM (or plan so that you can connect it later) to the air-sealing layer over the walls.
  • Be sure that you are placing the edge of the mesh so that it allows water to drip properly over the edge of your roof, and not down behind any part of your wall.
  • Integrate the fabric part of your Solitex UM properly with your wallโ€™s air and weather barriers so that there are no gaps.
  • Follow manufacturerโ€™s instruction for the proper order of installation of the Standing Seam Roof panels, drip edges, etc., while taking the following steps:
  • Each time you fasten any material through the Solitex UM, cut a small slit in the mesh layer above the fabric, to be sure that your fastener doesnโ€™t catch a strand of the mesh, and leave a pathway for moisture to travel along the fastener, and below your fabric.
  • As you place the roof panels, fasten them through backer plates to ensure that the fasteners do not damage or puncture your insulation board.

A final note on Solitex UM: If youโ€™d like to experiment with saving wall space, you can also use this on the exterior of your walls, instead of battens, and apply your siding directly on top of it.

Here are some detailed pictures of the roof install. 

Ventilation

For ventilation, we went with a pair of Lunos E2 units, and an eGo for the bathroom fan.

The units provide pressure-balanced ventilation, and the upper end of their CFM capacity is more than what we wanted for the tiny space, even given how much I appreciate fresh conditioned air.

Despite that, I would not recommend using just the E2 units without a proper bathroom fan of some kind. E2 pairs are not rated for enough moisture to be used in a bathroom.

In the warmer shoulder months when itโ€™s often too cold or wet to comfortably open a window, and too warm for the air to tend towards dryness – itโ€™s really important to get shower moisture out of the bathroom effectively.

Using both the E2 and a bathroom fan (especially the eGO) made the humidity manageable.

A bathroom fan also ensures that unpleasant bathroom odors do not become a problem.

(As an important side note: Lunos HRVs should always be located at least 1.5โ€™ from the ceiling in any location. These are often not placed correctly.)

Three year update:

I had some bad luck with the E-Go as a bathroom fan in a tiny space. The small channels in the ceramic core got moldy, and there’s no way to clean them. Luckily the problem was isolated.

There are a lot of factors that could have caused this, and it’s possible I could configure things to make sure it won’t happen again, but as of now, I can’t recommend the E-GO’s for THOWs. 

It’s important to me that I be able to clean all the air-flow-related appliances if needed. It’s possible to clean the E2’s very effectively – which I’ve done now, on multiple occasions. 

Luckily, all the Lunos products are easy to remove from their install tubes and replace them with any other Lunos product. so I replaced the E-GO with a normal bathroom exhaust fan from Lunos.

Dehumidifier

With the smallest 25-pint Kenmore Dehumidifier (Note from Corinne, they no longer make this size but this is another good dehumidifier) the house has been able to maintain 50% humidity or below at all times, even during the wettest moments of the summer months (most of the time the dehumidifier is not needed, but when it is, it clears out the humidity quickly, and much more effectively and reliably than any of the smaller options I looked into).

Here is a good and well-priced humidity meter. I have several thermometers with humidity meters on them – some positioned high, some low in the house, some floating so I can place them in corners or under surfaces to check levels everywhere. 

Range Hood

The final piece of the ventilation picture was a 24โ€ recirculation range by Summit. I had to remove their foam filter (which was supposed to be what caught non-oil food-particulate, but was shockingly diffuse, and wasnโ€™t even cut to the right size) and replace it with cut-to-fit carbon. I was happier with the carbon than a cheap foam filter anyway.

Three year update:

At first but we used the mini-split circulating air an E.L. Foust 160R2 air-purifier, and the Lunos units running we were able to manage with this set up. But we did change this out to a vented range hood.

I should have installed a vented range hood to begin with — one that was sized large enough, and close enough to the counter, to ensure capture of all cooking vapors.

I wound up having to do this over time — the recirculation hood simply allowed too much humidity to stay indoors, and overloaded the Lunos units with more moisture than they could handle.

After consulting the technical teams at Lunos and 475, I went with a high-quality Vent-A-Hood unit that was several inches wider, and deeper, than the cooking surface, and installed it about 18″ above the cooking surface (shockingly, that’s the minimum recommended height for most high-quality hoods. And it works well for me.)

They had very specific air-flow requirements for the hood I should get, given the nature and size of the space.

Because of the air-tight construction, a vented hood absolutely requires make-up air – and both 475 and the Lunos technical teams assured me that the E2 units could handle what I needed. 

If anyone goes with this approach, make sure to place the Lunos E2 units on walls that are opposite to the kitchen vent hood — so that there is no chance of them sucking kitchen exhaust back into the house.

Iโ€™ve lived in tiny houses before that became very moldy as a result of not being able to effectively vent and/or filter the steam from cooking โ€“ and the food particulate within it that creates the odors.

Heating and Cooling

For heating, we decided on an LG Artcool Premier mini-split heat pump, which is LGโ€™s highest efficiency model.

Mitsubishi makes the lowest BTU output model on the market at 6,000 BTUโ€™s, and their models have fantastic quality and durability. I have relatives whoโ€™ve owned their units for years now and have also made many calls to local HVAC companies, as well as Mitsubishi and Ecomfortโ€™s customer service staff.

All the agents I spoke with were very candid about the different brands and models.

Given all of that, as far as well could tell from initial research, the smallest Mitsubishi unit seemed like the best for tiny spaces. So why did we choose the LG Artcool Premier?

It turns out that even though the smallest LG Artcool Premier model puts out 9,000 BTU, the inverter LG uses allows the unit to step down heat output to just a bit less than the Mitsubishi Unit (at least at the time of my research, that is what both companies confirmed for me when I contacted them about the numbers).

This actually put the LG unit closer to the number the PHPP gave for the total BTUโ€™s weโ€™d need to heat our house (PHPP will tell you exactly how large your heater needs to be, among many, many other useful things).

So in this case, the LG unit will be able to almost match its output to our exact needs, under any circumstance.

As it turned out, the small amount of research Iโ€™ve seen from the Department of Energy indicates that having units be oversized for the space and unable to step down to the given needs, is a major factor decreasing efficiency.

Another factor is that the Mitsubishi unit automatically shuts off at around -13 F according to the submittal. The LG unit does not have an automatic shut-off.

Field reports from users as well as the company would indicate that it can continue to put out enough heat to heat a tiny space like ours down to as low as -20 F.

So in the end, the fact that our unit puts out 9,000 BTU is not a problem due to the inverter flexibility, and the extra BTU capacity also gives us some extra breathing room to keep using the unit as temperatures drop into negative digits.

Beyond all that, the LG was significantly less expensive, which I appreciated. You also get some additional items that cost extra with Mitsubishi (like the drain-pan heater).

The folks Iโ€™ve spoken with whoโ€™ve installed these units have emphasized that they tend to have very few problems โ€“ IF, as with any brand, theyโ€™re properly installed by a professional, and well maintained.

At this point, we can heat and cool (and ceiling fan!) the house for around 200-300 watts in most cases. This is amazing.

The dehumidification function is disappointing, and in general please remember to use the โ€œself-cleaningโ€ setting on the remote if you buy one.

Running A/C and dehumidification on these units can lead to them developing some mold after a while if you donโ€™t run the fan enough to dry the fins out. 

The โ€œself-cleaningโ€ setting does that to some degree, but I try to run the fan function as much as I can, and that also keeps really good air-mixing going in the house (and helps make up for the fact that we placed the Lunos Units too close to the ceiling!)

One final note about mini-splits: our installer seemed short on time, and insisted that he wanted to put the indoor unit on the same wall as the exterior compressor.

This is not what we had previously planned on, and came as a surprise.

Unfortunately, this meant that it was not only right over the foot of the bed, but would be somewhat obstructed by the only cabinet we had installed.

The location worked out fine, and it heats the space wonderfully regardless. However, I hope that if youโ€™re thinking of getting a mini-split for your Tiny House, you might be able to account for putting it in the spot that will be most straight-forward for the installer (and least expensive for you).

By having the lines from the indoor unit come straight out the wall above the outdoor unit, we saved him an immense amount of time on working with the copper lines, etc..

Part IV: Windows, Doors, Interior and Framing Details

Windows

Windows, for a Tiny House on Wheels (THOW), were items that we had to research and reflect a great deal on.

There are many different standards for what counts as โ€œhigh performanceโ€ windows, depending on who youโ€™re talking with.

For a certain section of the market, Marvin and Andersen are considered high performance and efficient. Weโ€™d had experience with them in the past, and although we were pleased with the workmanship and quality of service, they always became drafty in our region and could be frigid to sleep near.

In sections of the truly high-performance market, we found triple and quad-pane windows that were of incredible quality, but also way outside of our weight allowance and budget.

Luckily, we found that there is a small section of the Passive Haus and high-performance market that has been working with Heat Mirror technology โ€“ which is essentially a special kind of heat retentive film used in place of ordinary sheets of glass.

It is cost-effective and comes close to being in the same range of efficiency as panes of glass.

However, after speaking with some fantastic (and very honest) engineers at companies with some experience in Heat Mirror use, it sounded like most of them hadnโ€™t really figured out how to make the technology reliable in the long-term.

Right around then is when we were referred to Alpen High Performance Windows.

Alpen (formerly Serious Windows) has arguably more experience with Heat Mirror technology than any other company in the industry. Theyโ€™ve learned how to secure and seal the Heat Mirror film properly, as well as suspend the film so that it does not sag or cause distortion over time.

Theyโ€™re accustomed to using Heat Mirrors between glass of varying thicknesses and types, for all applications โ€“ and they do so for both triple and quad-pane units. This saves enormous amounts of weight.

Their manufacturing takes place in-house at their factory in Colorado โ€“ so they are able to have excellent levels of quality control over both the process and the product.

After a lot of pricing and research, I honestly cannot recommend any other company for high-performance windows to be used in THOWs.

They were also able to work with me to eliminate PVC from the windows I bought (replacing PVC glass stops with aluminum ones โ€“ the rest of their windows are made from an amazing low-toxicity fiberglass).

I found the PVC used in many PH windows to be a major problem in a tiny space, and many companies unavoidably include PVC and do not offer any flexibility to allow you to eliminate it.

All of the people I spoke with at Alpen were wonderfully kind, and either had the information I was looking for or readily put me in touch with someone who did.

If youโ€™re looking for PH Certified Windows that will fit into the weight constraints, efficiency standards, and budget for a Tiny House, I just canโ€™t imagine buying anything else.

For those who are very sensitive to off-gassing VOCs from window seals, there will be some of that with Alpen windows โ€“ as with any window.

People like us just need to plan some time in for things of that nature to off-gas before moving in. It didnโ€™t take long before they were fine for me.

Iโ€™ve never felt uncomfortable in front of one, even in -20 F weather โ€“ and I havenโ€™t yet seen even a speck of condensation on them (although the space has been extremely dry during the winter much of the time, often sub 30% humidity).

Here are more photos of the window install.

Doors

Researching high-performance doors for a tiny space was similarly challenging.

Again, weight was an issue for the extremely high-quality PH certified doors I saw โ€“ we just wouldnโ€™t have been able to balance it properly, or account for it in the overall weight budget.

They were also incredibly expensive and outside our financial budget.

Due to a recommendation from Alpen, and other folks we spoke with, we began looking into local ProVia dealers. They make high quality, well-crafted steel and fiberglass doors with R-values around 5, solid air-sealing values, and options for quality multi-point locks.

Just about a year before we contacted them, ProVia began manufacturing what theyโ€™re calling the โ€œEmbarq Door.โ€ They claim that itโ€™s the highest R-value unit on the US market, and many reps at their company seem to consider it to be the ultimate in high-performance entryways.

Although I feel someone at the company should inform these employees that there is an entire world of PH doors out there โ€“ many of which blow the Embarq away in pretty much every category.

I hope more people get a chance to look into it and see if itโ€™s a good fit for their project. It has some improvements to make, but itโ€™s a very high-quality American made door, for a decent price (depending on where and how you buy it).

The Embarq door is R10. ProVia built it more or less like a vault-door: with a tapered interior edge.

Based on our research into door options, it came in at between ยฝ and ยพ the cost of a certified PH door, depending on the given model and quote.

The Embarq makes use of ProViaโ€™s impressive Signet fiberglass technology โ€“ which is not only light but can also imitate a number of different wood grains, to the point of being almost indistinguishable from wood from six feet away.

On the downside, ProVia hasnโ€™t yet figured out how to use multi-point technology in the door (due to the vastly increased thickness over their standard doors).

Because of this factor, and the fact that they’re still tuning their manufacturing process for such a thick slab, the air-sealing figures suffer a bit compared to their normal doors โ€“ despite the multiple layers of seals they use.

They seem to be figuring out the manufacturing process and how to work around the slab thickness and seals, which can make for tricky installs โ€“ especially if youโ€™ve ordered a wide-jamb door, as we did.

For our interior bathroom door, we picked up a free slab with hinges from Craigslist. I apologize to those who were hoping for something prettier!

Interior Framing Details

On the interior of our envelope, after much debate and reflection, we decided to go without a service cavity in the walls. This is not a choice that we made lightly, and I wish weโ€™d been able to include one.

Because we had the space, we were able to use a service cavity in the ceiling โ€“ and we packed as much electrical into that as we could, and fit 100% of the plumbing into the interior bathroom and countertop space.

For what little wiring was left over in the exterior walls, we settled on surface-mounted outlets which allowed us to avoid large holes in the membrane.

Air-sealing a Romex cable is pretty straight-forward with Tescon Vana and it saves a lot more air-leak risks than a larger hole.

We did use one air-sealing outlet-box from 475, and it was awesome (i.e., sleek, space-saving, easy, effective, etc.).

If I had the chance to go back to the electrical phase, Iโ€™d just use the air-sealing boxes everywhere instead of the surface mounts.

If I had a chance to do the whole project all over again, I would want to do a full-on service cavity in the walls.

Here are more pictures of the electrical.

Using a service cavity is the best way to assure a fully intact and functional interior membrane, and it just makes everything in the finish phase more straight-forward.

In our case, we would have either had to trade the 2×6โ€™s we used (to increase structure and insulation) for the service cavity space, or make the interior an illegal living space by making it smaller than 7โ€™, side to side.

We made the best choice we could at the time, and I was very focused on trying my best to get as efficient and moisture-sound as we possibly could.

As an additional note on where I was coming from, no matter how I configured it, U-Wert consistently showed us significantly better efficiency and moisture numbers for a 2×6 wall cavity with 2โ€ of exterior insulation, than with 2โ€ of exterior insulation, 2×4โ€™s and a 1.5โ€ service cavity.

I donโ€™t know if this was just a glitch in U-Wert, but especially the moisture performance calculated as clearly superior, even when using a 2.5โ€ service cavity.

I think this might be due to the fact that the inboard membrane had all of the insulation to the exterior of it so that the total amount of wall insulation was not broken up by a second set of framing members, and the membrane.

U-Wert also showed a clear improvement in moisture performance when the service cavity was left un-insulated, so I imagine that the additional insulation on top of the Intello created more of a temperature difference between the inside air and the Intelloโ€™s interior surface, which made for greater condensation risk there in the winter.

I hope those who are much more in the know than myself, and with expertise in WUFI, will chime in with their thoughts.

Obviously, both wall cavity sizes are far, far smaller than any truly Passive House in the Northeast. Based on my tinkering with U-Wert, I do not imagine anyone with a Passive House in this region would see moisture dynamics of that kind in their assemblies, due to the much larger amount of insulation exterior to the Intello.

The U-Wert analyses certainly support that idea โ€“ and I can see that principle at work in how the numbers for our roof assembly worked out.

Because of the greater amount of insulation exterior to the Intello membrane, we could have easily insulated the service cavity without much condensation risk.

However, given that we wanted to squeeze as much insulation into the walls as we could, we just couldnโ€™t see making wall service cavities and not insulating them.

To moderate the risk we faced by not using a service cavity on the walls, we worked with John Kingsley, at Kingsley Woodworking in Ithaca NY, to come up with a creative approach.

John was the only person we found who could mill us ยฝโ€ Poplar T&G panelling (or ยฝ panelling in any wood species). He did a beautiful job milling and sanding it. Because John knew we were trying to save weight, he mentioned to us that he could remove a small rectangular portion of wood from the back of the panelling, without compromising the structural integrity.

He calculated that this would save us quite a significant amount of weight over the whole structure. Once we saw the kind of thing he was talking about, we also felt like the extra space behind our panelling might provide a least a little bit of additional room for moisture and air exchange, which helped us feel a bit better about not having a service cavity.

Because we knew at least some of the paneling would have to be in direct contact with the Intello during its least permeable mode, we made sure to paint all four sides of the paneling boards with highly permeable Romabio mineral paint.

Romabio felt that the paint did a good job of protecting wood from liquid moisture, while at the same time remaining vapor open.

We wonโ€™t know whether this approach worked until some years have passed, or we cut a paneling sample to see what it looks like on the underside.

Note: in a three year update, Terran reports that the walls have been opened for inspection and it’s been dry as a bone!

There were a lot of approaches we took with the interior, in order to try to maximize the efficiency of the space or minimize weight while maintaining high-quality.

Countertops

Eco Supply Center, which was the source of our Facade-Grade Thermacork, also very kindly walked us through the process of buying and DIY-ing Richlite for our countertop.

Richlite was by far the best material we found for this purpose, after a lot of searching and ordering samples.

Richlite is 0 VOC, waterproof, far more durable than wood, and weighs a tiny fraction of stone or other high-quality non-paper-based solid-surface options.

Cutting and installing it ourselves was a little daunting, but between the amazing assistance from folks at Richlite, and the great people at Eco Supply Center, we were able to do it (at least to our standards!).

In the end, we were able to use a totally normal saw blade for the cuts, but it did need to be high-quality, and sharp โ€“ at least in the beginning.

After making our cuts, the Richlite dulled our blades to the point of them being basically useless. We certainly took that as a testament to how robust the material is, and it was great to be able to DIY it since most other non-wood countertop materials must be cut with professional equipment.

Part V: Water and Electrical

Water Heater

The folks at Stiebel Eltron were an incredible resource for water heating. I searched an awful lot for a hot-water heater that would allow us to avoid plumbing propane (and re-filling propane tanks) and would give us on-demand levels of efficiency for the small amount of hot water I needed.

All the on-demand electric water heaters I found required much more amperage than we would be able to run to the THOW, even the amazing range of on-demand units that Stiebel Eltron makes (their lower-flow, lower-power sink units just werenโ€™t designed to put out enough water for showering).

After using an incredibly effective little 6-gallon water heater in India, I started looking into similar options on the US-market but found them to be generally unreliable based on reviews.

They were disappointingly inefficient.

They were also not built for long-term serviceability and became trash as soon as most anything needed to be replaced.

Stiebel Eltron makes by far the most efficient small-tank water-heaters on the market, and during my search, they released their 6-gallon model. It is serviceable across the board, and replacement parts are available through Stiebel Eltron for anything you might need.

In my experience, with a low-flow showerhead from Niagra I can have all the water I need to take a more-or-less normal (though by no means long) shower, so long as I make sure the tank is up to temperature before I start.

It takes some care and practice playing with the hot and cold, and my preference is to keep the tank temperature right about 115 through most of the day, then turn it all the way up before taking a shower, and wait for it to get up to temperature before jumping in (there is a light on the side of the unit so you can tell when itโ€™s running, and when itโ€™s up to temperature).

The unit has been extremely quiet and draws 1300 watts when in use (according to the literature, it has around ยฝ KW standby usage per day, at 120 F, if you leave it on all the time).

That was low enough to fit within the bounds of the underground electrical service we were able to run to the house, and I am extremely grateful for that.

Electrical

Along with an induction cook-top, and the previously discussed heat-pump mini-split, everything fit just fine into a 50 amp service.

With some care, we could run the house on an extension cord in the future if needed โ€“ and weโ€™re now all set to run on renewables like solar, if I ever have the money for them.

After talking with a number of people in the industry, it seems like with decent sun exposure, we would need very, very little in the way of a solar array to off-set the entire foot-print of the THOW.

And here is one last album with general construction details!

Closing Thoughts

I hope that we might have shared something here โ€“ either through the text, video, or pictures โ€“ that will be helpful to others.

There are so many good intentions in the Tiny House community, and I worry that far too many people wind up with spaces that fall short of what they expected in terms of comfort, health, and efficiency.

Iโ€™ve been inspired by folks who broke out of the main-stream to experiment with addressing those problems โ€“ like Robert and Samantha at Shedsistence, and Leaf House in Canada.

I hope we can all work together to make tiny structures live up to their potential, and become healthy, comfortable, efficient, affordable, and legal spaces for people to live.

-Terran (owner/builder)

This post was written by Terran, whose expertise was self taught and informed by multiple building science experts like the engineers at 475, and John, an architect at Rebuild Studios.

To donate to help Terran cover his living expenses you can find more info here.

healthy home build consult

Corinne Segura is a Building Biologist Practitioner with 6 years of experience helping others create healthy homes.

Did you find this post helpful? If so you can donate to Terran to help him with living expenses.

Filed Under: Mold-Free Building, Tiny Homes and Trailers Tagged With: Healthy building, mold avoidance paradigm, mold free building, tiny homes and trailers

The Locations Effect – Canadian Locations

June 15, 2020 by Corinne 2 Comments

I’ve been watching reports on healing locations in Canada for ten years. Being Canadian myself, I have kept a keen eye out for anywhere that looks promising.

For a long time, there were not many extreme mold avoiders in Canada who were unmasked. So reports were conflicting, sparse, and hard to make sense of.

I now feel that I have a good grasp on the reports. We have more unmasked mold avoiders healing in Canada.

I myself have been to quite a few of these places, and many of us have met up in person, which helps me corroborate info and compare levels of environmental sensitivity.

I have followed the stories closely of those avoiding in Canada and through triangulation of reports I have put together my take on which locations have good outside air free of outdoor toxins, which are just OK, which ones went bad, and which ones are just no good at all.

If you are new to The Locations Effect, this is my main post explaining the topic of pursuing mold avoidance in locations free of outdoor toxins.

British Columbia

Vancouver Island

Vancouver Island and the Gulf Islands have been healing locations for many folks over the years. Dave Asprey healed in Duncan BC, just down the road from where I first made major progress in my tiny house. A couple of other mold avoiders came to visit me and found the area to be good.

Others have reported Vancouver Island to be quite good before the fires in 2018. During that time a lot of flame retardant was dumped all throughout BC, creating widespread FRAT (flame retardant associated toxin).

The waters around Vancouver and Vancouver Island are also dodgy for the toxin known as Mystery Toxin (MT), creating really tricky plumes that can form on the breeze and even blanket Victoria during foggy days. This is very likely due to the sewage dumping into the water around Victoria.

Though a few mold avoiders have found some healing in Victoria and Sooke, it is a very tricky area due to FRAT and mystery toxins. Not for the beginner, unless you are only mildly affected by mold and environmental toxins.

Gulf Islands

We have had two good reports from the Gulf Islands. One was Saltspring Island from someone not extremely sensitive, and one was from another nearby island.

Caution to those very sensitive because the ocean water toxins around that area mean the smaller islands off Vancouver Island are not necessarily better locations.

FRAT in BC

My thoughts on escaping this devastation of FRAT we unleashed on the province was that it was likely necessary to escape to the Yukon to get very clear of this.

That has been confirmed by one of our most unmasked mold avoiders. Though the area is not 100% clear of FRAT, she reports, the area is much easier to navigate than BC.

BC Interior

The interior of BC has mostly bad reports from unmasked mold avoiders, with the Okanagan and Slocan valley usually getting bad reports.

Though we have one unmasked mold avoider citing that skilled avoiders could find good pockets in the Oakanagan.

Nelson has two OK reports from folks who are not as extreme, with one good report on Nakusp. Though reports do indicate the 2018 fires worsened this area, and it is not as good as it was.

Cranbrook, East Kootenay area, was reported surprisingly good – at least for the interior of BC.

The Rocky Mountains

The Rocky Mountains have for a long time been reported as an excellent area in Canada, both on the BC and AB side.

But more recently, since those same fires in 2018, the most unmasked, or most sensitive to the environment, have not found this to be a pristine environment anymore. Flame retardant associate toxin (FRAT) is reported all throughout this area. A big loss.

Those less sensitive may still do well here, but it’s not a world-class location anymore. It is still better for many folks compared to the south coast or interior of BC.

Northern BC and the Yukon

A unmasked mold avoider who has gone into remission has found good healing spots around Whitehorse, YK. In the town (at least in the summer) might not be perfectly clear of toxins. Areas outside of Whitehorse, have been reported as pristine. Pine Lake campground is one example.

I’m sure there are many good areas in the Yukon if you can bear with the weather.

Northern BC may be good for some, if you are not too affected by toxins, as the air did appear to improve further north, with Prince George, and Fort Nelson having areas clear of all major outdoor toxins.

Alberta

The Rocky Mountains AB, as I mentioned, have the same reports as on the BC side.

Calgary and Edmonton, have gotten OK reports from some (and even good reports from those new to mold avoidance). This to me indicates the area is not that great or is patchy based on the area or time of year.

Lethbridge has mixed reports.

The one spot that comes recommended as “clear” in Alberta is Chain Lakes. Two people have had the same assessment of Chain Lakes.

Big Cities in Canada

Most of the big cities have been reported as at least semi problematic for those sensitive to outdoor toxins, with Ottawa usually reported as the worst (I agree!) But other big cities are fairly difficult as well.

It depends where you are in your healing, those not very sick or fully recovered can expect to go back to one of the major cities, as most are not absolutely terrible.

Certainly many less sensitive folks have done well (or well enough) in Edmonton, Calgary, Victoria, North Vancouver, and even Vancouver proper.

When highly unmasked I could always feel a dramatic improvement in North Van, especially near the tree line, compared to Vancouver. Though keep in mind Vancouver proper is my ground zero, where I got sick with CFS. That can skew things.

We also have quite a few bad reports from all those areas – controversial areas indicate it’s not that great of an area, usually. There are also differences in which toxin exactly knock folks out.

One very experienced avoider can dodge MT areas in Vancouver and Victoria. Many others get slammed. Toxins in these areas can be inconsistent – dependant on season, weather, wind, fog, snow etc.

I found the Toronto area to be OK when I was less sick, but not a place for recovery after major mold injury.

There is some consensus that the Vancouver area is better than Toronto, however, that was before the fires of 2018. Toronto is full of MT and BC is now more FRAT.

Quebec

The area north of Montreal has been reported good by a couple of very reliable mold avoiders – Sainte-Adรจle and Laurentian Mountains.

And although it’s an old report, I have seen another big improvement even further north, camping in Quebec.

In terms of finding good areas north of Quebec, it’s not a straight line of better and better further from the city. Sainte-Adรจle appears to be a bubble of a clear area. And, just like almost every location on earth, the Laurentian Mountains have pockets of good air and not so great air.

Though it’s great that we have more than one really good report here, this area is of course very cold in the winter.

Ontario

I lived in southern Ontario for 10 years in the middle of my illness. I was not unmasked at the time but I personally did not find any relief from “cottage country” north of Toronto or anywhere within in a few hours of Toronto.

I have seen someone do well north of Toronto, but she was not unmasked.

There are many areas like this that are good enough for those in the early stages. If you are right out of a moldy house and into the wilderness you can often feel a lot of improvement, even if the area is not considered pristine.

This is not where I would head if I had a choice.

The Maritimes

I don’t have any good reports from the Atlantic coast of Canada. I did go to PEI, but it was a long time ago and I don’t consider that report to be very accurate anymore. I didn’t do well there.

For the top spots in the US, I made this booklet. If I make future booklets I will also share those with the mailing list.

Newsletter

Sign up for news, deals, and the free ebook:

Permissions

The information you provide here will only be used for our newsletter. Your privacy is important.  

Please let us know how you would like to keep in touch:

By submitting this form, you acknowledge that the information you provide will be processed in accordance with our Privacy Policy.

Thank you!

You have successfully joined our subscriber list.

.

More on – What is a Mold Sabbatical and what you need to bring with you.

Did you find this post helpful? If so you can buy me a coffee to support the research behind this blog. Thank you!

Buy Me a Coffee at ko-fi.com

Filed Under: Mold Avoidance Paradigm Tagged With: mold avoidance paradigm

Emergency Housing for Chemical and Mold Sensitivity MCS / CIRS

April 2, 2020 by Corinne 21 Comments

Emergency Housing for those with Chemical Sensitivities (MCS) and Mold Sensitivity

This post contains affiliate links. Upon purchase, I earn a small commission at no extra cost to you.

Here is a list of some housing ideas for those with environmental sensitivities needing immediate or temporary safe housing.

KOA Cabins

KOA cabins are located across the US and Canada. The cabins are made from mostly safe materials (mostly wood) and have been reported to be good places to stay for those who are environmentally sensitive.

Ask if the wood has been stained recently. The bathrooms are separate and may or may not be mold-free, depending on the location.

Recently I’m hearing reports of these having gone moldy. If the foundation or roof is not done right there is a high chance these could go moldy. Often newer is better for mold.

Home Made Tents

Regular tents can be difficult because of the chemicals used on the fabrics, the lack of insulation and the tendency for them to go musty very easily and be a lot of work with the airing out and drying out.

I have a preferred tent which is an off-the-ground tent in my post on camping gear. Here are some alternatives:

Reflectix Tent 

Reflectix provides some R-value and reflects light so that should work in a lot of different climates, though the seams will reduce the insulative value and add more glue and more potential for leaks. There are simpler designs for the structure that will reduce seams.

You can’t buy these – you would have to look online for the metal structure, then buy the Reflectix, foam, aluminum tape, and duct tape and then have someone make it for you. The tape may make this intolerable for some. And this also lacks airflow. 

You would also make at least one triangle out of polyethylene or an EVA Shower Liner so that you have some light. But have a flap of Reflectix over it that you open and close over this “window”.

Plastic Tent

A woman sitting outside of a tent that she made from Tyvek plastic
Kim’s tent via Paradigm Chage.org

Kim was severely sensitive to chemicals. She made a tent out of Tyvek which she tolerated well when extremely reactive. She explains how to make it here. Through extreme mold avoidance, Kim made a full recovery.

This is a plastic used as house wrap.

There are so many options here on what you can build an emergency tent out of. It all depends on what you can tolerate.

It may not last forever but it may give you some time to find another option or even bring down your MCS which will open up options. 

Other materials you could use: polyethylene, tarps, even hemp fabric if you are not expecting rain and don’t have high humidity.

Foam Tent

A A frame foam box that I set up inside my cargo trailer for sleeping in

When Sara was an extreme reactor (also now recovered), she made a simple structure out of XPS foam boards. The two-inch boards of XPS (usually Owens Corning brand can be found easily) have a high insulative value.

She arranged them in a tent shape, the groves in the edges holding them together. Rocks at the base pressing them together. Of course, you could use tape if you can tolerate that or put plastic over the whole thing.

Above is my version made of polyiso foam. This is a “foam tent” used inside a non-insulated trailer that was cold and still offgassing.

I hooked up a Panasonic ERV and ran fresh air into the tent at night via a 4-inch aluminum tube. The opposite end of the tent had a 4-inch hole for air to exit.

This is a highly effective way to deal with offgassing – fresh air is pouring through, though it can be difficult to control the temperature and humidity this way. 

Coroplast Tent

This Youtuber built a foldable shelter out of the safer plastic Coroplast. The downside is the amount of tape needed to form a shelter like this.

Simple Wood and Foam Shelter

The actual wood frame which was the cover of my foam shelter

Inspired by the idea of a foam shelter, I have made two highly insulated shelters with ridged foam, raised off the ground and covered in a tarp.

A wood structure like mine pictured above, may be needed to protect from wind and snow. 

The frame was covered with a tarp and inside on the plywood platform was a box made out of foam. This shelter worked extremely well though there are things to keep an eye on in the long term.

Here are some video tours and here is a post devoted just to this shelter (the second one had no wood framing above, just a tarp).

A digital sketch up of a wood A frame on a platform that my foam shelter went inside.

The whole thing was completed with some volunteer and some paid labor for 1000 CAD. 

Such a robust frame is not always necessary. You can build the plywood platform, with foam box on top and simply string a tarp over this if you don’t have strong winds or lots of snow. 

This is the same structure with a tarp over it and the XPS foam box secured with tape inside. The design can be improved by fixing the tarp, painting the foam structure and using clear tape. Please contact me for details if you want help setting something like this up.  

Here’s another example of a foam box. Just don’t put it right on the ground like they did here, and you want another cover on it. This is polyethylene foam which is much more unusual. 

Insulated/Aluminum Tents

These WeatherHyde tents are insulated and the foil on the inside will also block most of the VOCs from the fabric on the outside.

They say you can sleep in them down to 0 degrees Celsius.

They are 600 USD.

They look like they would have problems with airflow and condensation inside. As well as being straight on the ground, but they may work for some people. 

The shift pod for 1300 USD is similar but with the reflective layer on the outside.

This will help reflect the sun and keep cool in sunny weather when there is no shade.

But I don’t know how this will perform well with condensation inside.

The best of the typical tents have an internal mesh layer, then a gap with a rainfly on top. If you don’t use that system you usually end up with condensation. 

There are other similar tents cropping up that were designed for Burning Man festival.

For a lot less you can get a simple aluminum-lined small sleeping tent. It’s not insulated but the aluminum on the inside is more tolerable than the usual tent materials and does reflect heat inside. 

Regular Tent

My tent outside an cob house at OUR ecovillage
My first tent CC BY-NC-SA

There is no perfectly chemical-free tent, The most tolerable brands include Ozark, Big Agnes, REI, LL Bean, Colman, and Lightspeed. Everyone is different. 

Moonlight makes flame retardant-free tents coated with silicone on the outside and polyurethane on the inside.

Here is my post on safer camping gear which goes through all the major brands that folks do well with.

In the post, I also discuss canvas cotton and hemp for really dry climates (or temporary use) which may be where the most sensitive need to start.

I would also check out the cuben fiber tents mentioned in the camping post.

Yurts & Huts

A green plastic yurt on a platform at OUR Ecovillage on Vancouver Island
Me at a yurt at OUR Ecovillage CC BY-NC-SA

Yurts are often tricky for a few reasons. They are normally made out of PVC which takes time to offgas.

On top of that they are difficult to insulate, although one could just use them as an uninsulated tent.

The wooden framing can be susceptible to mold if there is a lot of condensation inside or with high humidity inside, which can happen when heating up a small space.

The wood also might be treated and could cause reactions. There are yurts that have metal framing which may be preferable for some people.

Here is an example of a metal-framed yurt.

You can create your own outer yurt cover by using a more tolerable material, although it will not be as long-lasting as PVC.

You can use materials used to make a tent, or polyethylene sheets that are used for greenhouses, or tarps. You could also go truly traditional and use hides.

One really positive design feature of yurts is that they are lifted off the ground on a platform. All metal yurts may work for some. I have looked at those in the post on simple shelters. 

These glamping tents by sweet water bungalows are PVC, with a canvas top (prone to mustiness), but the guide and framing could be used to create a tent with a plastic of your choosing.

Just keep in mind polyethylene is not as durable, but is less toxic. 

I wouldn’t use canvas for anything other than a short and dry camping trip but without the breathable roof these are prone to condensation.

Conestoga huts have a simple design for a little hut/glorified tent. A simple design that goes up fast is a big benefit.

I have not been able to review these plans for mold preventative building, but it’s an interesting design. If you have the plans for these will do a free review.

If you don’t insulate this it shouldn’t be a problem. If you do want to try these with insulation please reach out to me or an expert in building science. I am not presuming these are a mold-safe design.

Simple Metal SIPS Shelter

Two walls going up of the small metal SIPS house

You can easily put together click-together metal SIPs to make a fast, clean and fairly durable structure.

SIPS are structurally integrated panels. Metal SIPS are made of steel-styrofoam-steel sandwiched together. A highly tolerable material for those with severe sensitivities.

Because these are structural you don’t need to build a frame. Pour a concrete slab, and then once you have the panels it’s fast.

To create a long-lasting structure you would add siding but if you need something done fast, just put it up.

This little shelter is made with Structural Building Systems panels.

A small metal SIPS house in the desert

Sheds

Steel sheds can be bought from Amazon or hardware stores for 700-1000 dollars.

You will also need to build a foundation (you could also just leave it as gravel), pay for labor to set it up, caulk the whole structure and likely put in some insulation.

For everything you need to know about setting up a shed to live in see this post by EI Wellspring.

Sheds are not as easy to take down as you would expect.

There are also wooden and plastic sheds. I have seen some good little wooden shed kits made of solid wood.

Raise them off the ground and cover with a tarp above that is not touching the shed.

I like cedarshed.com for those who can tolerate cedar because it’s a highly rot-resistant wood.

Check out the wood first, see how it was stored and test it for reactions. 

Hard plastic sheds will work for many people. The more flexible the plastic the more it offgasses. PVC should be avoided where possible.

Glass Enclosures 

A greenhouse in the desert used as a shelter
www.buildahealthyhouse.com

A greenhouse can be used for backup shelter, it gets very hot when the sun hits them in warmer seasons and can dip really low at night in colder temps.

But some people have used them successfully. Margaret (another person who used this strategy to heal and make it back to indoor housing) talks about her experience with them here (her greenhouse pictured above). 

Other glass/metal enclosures brands are Handi Hut and Four Season.

Small sketch up for a glass and foam stucture with glass as the interior walls and foam on the outside with a tarp over it.

I designed an all-glass on the interior shelter with insulation on the outside. This was designed for a time that I could not have metal or wood inside touching me.

The walls and floor were glass. The ceiling would be easier to make out of metal.

The shelter was raised off the ground on a platform. Outside of the glass was 2 inches of foam insulation. To hold this insulation on, the exterior framing (outside of the foam layer) was attached by drilling through the foam and glass. The foam needs to be airtight to the glass. A tarp should cover the shelter.

Back of a Pick-Up Truck

Try and find an aluminum canopy for the back of the truck, which is the best-tolerated type.

The bed liner may need to be offgassed or can be covered with Reflectix.

If ordering a brand new truck you can request no liner.

Cargo Trailer

A cargo trailer that I converted into a RV

Details on converting a cargo trailer safe in this post. 

The company WeRoll can customize these and they have more robust roof lines compared to the standard models. 

Ambulances and Refrigerated Trucks

A decommissioned ambulance used as an RV home

The benefit to these two options is that they are already insulated and ready to go.

A decommissioned ambulance is insulated and offgassed since they already have quite a few years on them by the time the government sells them off.

Refrigerated trucks could be found either new or used and they are well insulated and also ready to go.

If you went new you would have to check out the offgassing levels to see if it suits you, but I would expect it to last longer.

Creating a Safe-Room in Your House 

To create a non-toxic room in your home you can use Denny Foil, or heavy-duty aluminum foil on the walls/ceiling/floor.

These materials block VOCs (chemicals/toxins including mold).

Heavy-duty aluminum foil is much easier to work with than the type used in cooking. You may need several layers to totally block smells. 

You want to use green Painting Tape for this as it will not damage the walls and is easy to remove – a healthy person could rip off/take down the whole room is probably 20-30 min (small room). The blue tape is toxic so I wouldn’t use that. You could use aluminum tape but it is very sticky and will leave a residue and will be hard to take off. Aluminum tape also smells and offgasses more than green tape.  

I would not do this where you have colder air inside than outside (AC use). 

Cover outlets. As for light fixtures, I would go around them. 

The only thing in the room should be clean bedding i.e. a new non-toxic mattress or camping cot (etc). New non-toxic bedding and pillow.

Be careful that when you open the window or the door that the air coming in might not be good, so this won’t be a long-term solution. 

If you can’t foil the walls you can make a room within a room and use positive pressure as explained here in this post. The picture above shows how pressurized rooms keep out contaminants.

You can use foam, plastic or any airtight material. Isolate that by using positive pressure which will work to reduce chemicals like offgassing.

That can be a solution for someone extremely sensitive who has trouble with offgassing (when the issue is offgassing rather than mold).

You can find more information by researching isolation rooms. 

Ecovillages

A cob house at OUR Ecovillage on Vancouver Island
A cob house at OUR Ecovillage CC BY-NC-SA

Staying in a cob house (or straw bale, adobe, light straw-clay house) can be a really good option 

Ecovillages may rent out rooms in natural homes and there is a possibility of getting in on the communal meal plan as well. Search for some in your area and ask about monthly stays.

I have seen some natural homes listed on AirBnB as well as on lists of intentional communities/ecovillages. 

Always ask about propane, natural gas, cleaning products, and water damage. I have found that is wet/cold climates cob and similar materials do not hold up to mold after a few years.

Slabs and roofs often have mistakes that lead to mold. Green roofs can be very problematic. Amateur built houses are especially prone to mistakes that lead to mold.

This type of building is best when raised off the ground, or with a simple roof, otherwise, don’t bank on this being safe if more than 1-3 years old. 

Ecovillages are also a good place to set up a tent where you might have access to outdoor bathrooms and kitchens that are more MCS safe than campgrounds.

It may also be a safer environment for those traveling solo. I have used the Intentional Communities website, Google for places near you, and the site wwoofing.

If you have physical energy you can work on a wwoofing site in exchange for free rent (camping or small cabin usually) and often food.

Another option for those who have energy to do work is remote cabins that are advertised on Craigslist where you do some house and yard work in exchange for rent. The cabins might not be safe, but this could be a free spot to camp or live in a trailer. 

Other Emergency Housing

We should have emergency and long-term safe housing for people with MCS, but in reality, there is very little.

Check out the Environmental Health Association of Quรฉbec if you are a Quebecer. 

For housing listings in the US and Canada, join EI Safe Housing on Facebook. 

When I come across AirBnBs, hotels and short-term rentals that look safe I list them on my Pinterest page.

While many turn to Airbnb or other short-term rentals, in the beginning, this can be a difficult and sometimes impossible road if one is super sensitive and/or masked to mold. 

healthy home build consult

Corinne Segura is a Building Biologist Practitioner with 6 years of experience helping others create healthy homes.

I spent two years in tents and small structures in order to heal from extreme chemical sensitivity. 


Did you find this post helpful? If so you can buy me a coffee to support the research behind this blog. Thank you!

Buy Me a Coffee at ko-fi.com


SaveSave
SaveSave

Filed Under: Healthy Interiors, Mold-Free Interiors, Tiny Homes and Trailers Tagged With: camping, emergency housing, mold avoidance paradigm, tiny homes and trailers

Pandemic Plans for those Homeless from Mold and Chemical Sensitivity

March 14, 2020 by Corinne Leave a Comment

Updated in April 2020

Areas of Concern for those Homeless or on the Road for Mold Avoidance or from MCS

Updates April 25th – Campsites are re-opening in many states: Tennessee, Georgia, Alaska (weather dependant), Alabama, Arizona, Oklahoma, Texas. Check each state to see if private and or sate parks are open.

May 1st should see another wave of openings.

  • Gyms closed in Italy and highly affected areas. Gyms are closed for the most part in North America now (march). Those reliant on gyms for showers and lockers need to make other plans.
  • Post offices closed for airmail in parts of Italy. This is less likely to happen in North America, however, those in Europe may want to prepare for what Italy has gone through. Those who need really important supplies like supplements and other necessities for mold avoidance should have the basics, especially now (late march). Many supplements and essential supplies are selling out. In Canada the Post office and UPS PO boxes are deemed essential services and will stay open for now.
  • Stores closing, Amazon restrictions – many stores are closing that mold avoiders buy supplies at. Many countries are closing “non-essential stores” like clothing stores and camping supply storse. Amazon is only restocking “essential” (to normal people) items. Nonessential orders are delayed.
  • Govt campsites are closing. Those living in campsites are being hit hard. Here is the current list of closures in the US. Here is another website to double-check. BLM land closed some showers/bathrooms. Campsites in southern Canada closed as far as I have seen.
  • Private campsites closures expect and plan for closures or getting quarantine at the site. It’s also possible the government closes them due to this being a gathering place of sorts. Campsites are closed in Italy. Private campsites are closing in the US (March 22).
  • Airbnb can kick anyone out of a stay in progress (even a long term one) with 24 hours or less notice. The owner only has to say that they need the place for themselves and that’s it. No proof (from what I saw when I was booted) and you’re out. Short term rental sites like Airbnb are being restricted depending on local laws. You may not be able to move after lockdown goes into place, or bookings under 30 days may not be allowed. It may only be open to those health care workers, those in quarantine or those homeless. It depends where you are, but be prepared for both of those to happen.
  • General movement restriction. Italy and China have been especially strict with movement. The US and many other countries will not have the power or resources to restrict movement to this degree. The US and Canada are headed towards if not already in “Shelter in Place” (March 22).
    Hunker down in one location as best you can. In the restricted regions of Italy you have to put in a special request to be able to move apartments. You cannot move outside the area other than for special circumstances, of which mold avoidance will certainly not be one of them. The US is restricting movement between states in some areas.
  • Forced quarantine, especially when crossing borders is too risky for those with high reactivity to indoor housing. I would not move countries at this point (mid March).

Where should you hunker down?

In most of the Western world now is the time to start to secure your location if you are doing mold or HT avoidance, or are homeless from chemical sensitivities.

A couple of people have bought vans and trailers to create a stable (or flexible) place to stay during the viral pandemic.

Though most are simply looking for a stable location where they can stay in one place.

Where to park or camp

If you are on the road I would start to look for places where you can stay for the next three months.

I would not bank on a campsite staying open – I would have another backup plan as well.

With government campsites closing in the US and parts of Canada, I would also expect more or all government campsites to close down.

Some people have moved over to BLM land in the US, however that does not seem like the safest place to be in the long term in terms of accessing resources while on the move. They are starting to shut bathrooms and showers (March 15).

It could be possible to wait it out by camping off the radar on BLM land, especially if you have no other option, but it’s not too clear what kind of complications you might face with movement and getting supplies or if you do get sick yourself.

Check out new sites that have opened to help folks find places to part their RV like NomadParky. There are Facebook groups as well.

My severe flu while camping:

I did get a severe respiratory flu with (and Erichlia at the same time) two years ago while camping in Florida. My tent washed out in a storm the night I got sick and I ended up forced to sleep in a truck that I was reacting to.

Luckily I did have that truck as a backup and I was warm enough.

Make sure you have supplies of food, water and what you need to stay warm if you get sick.

While both my helper and my one friend also had a severe flu and couldn’t help me, I did have a stockpile of bottled water, canned soup, and replacement gear. I had little choice but to wait it out until others recovered and could help me get a new tent set up.

While the situation worked out, it was close to deadly for both me and my friend who had a fever of 105.

Camp/park on private property

This would be the time to start looking at places you could park your RV, car, van, or pitch your tent on private property where you will have some safety, privacy and stability. You can ask around with people you know if you can park or camp there.

You could also look at regular market rental houses that have a parking spot or backyard.

The safest bet right now is a regular market rental now a friend’s or family’s place. More below.

Accessing BnBs During the Pandemic- pros and cons

The final option is of course to rent a BnB. I have been following the price changes that are related to the virus outbreak.

There are a few challenges with Airbnbs but it could be a good option for many.

Pros

One benefit is that prices are coming down in many places. They came down slowly until the area is severely affected by the virus or there is a full travel ban, and only then they are coming down by a lot.

There are few places just outside of lockdown cities where prices have gone up as people try and escape the city lockdown!

If cases are on the rise in your area this may be the time to negotiate a medium-term 1 to 3 months stay with a host. Hosts will start looking for more stability with their rentals and might be looking for fewer people coming and going. In most places right now this would be the time to negotiate a monthly rate and longer stay. Get checked in before your area goes into lockdown.

Cons

There will, of course, be some people that need to come back to their own BnB themselves if things go badly, since some people are actually renting out their own house.

Anyone can be booted with 24 hours notice from a bnb they are currently living in even if it’s a long term rental. They only need to tell Airbnb they need the rental for themselves or their family and you are out just like that.

Be very cautious with a room in a house or any shared property since they may decide (and I think it’s more likely than not) that they do not want to have the risk of anyone sharing their house if things escalate.

I would ask the owner upfront if there’s any chance that they would need the property for themselves if the outbreak gets worse, and how else the outbreak could affect their plans to rent out the bnb. I asked the owner where I was staying this she lied about it and booted me with 3 hours notice (by the time she actually got ahold of me it was only 3 hours).

The most ideal situation, for those living in RVs, cars and tents, would be to afford to rent a whole house where you can safely park or pitch a tent without anybody’s interference.

It appears that some bnbs are being taken off the site and converted to regular long term housing. So you might find them in regular classifieds. Though in many places you cannot view a long term rental before signing a lease.

In some places there are government restrictions on being able to move into a short term rental like the vacation rentals or you may only be able to book more than 30 days. Check into your rental before the lockdown starts.

Back up plans

Now is the time to lock in to a rental if you haven’t already.

If you are relying on a bnb/vacation rental, your rights are not as strong as if you were in a regular market rental. If hotels and campsites close and if you can’t view regular rentals make sure you have an idea for a backup plan.

What about hotels?

Hotels are a little riskier based on what’s been happening in countries with a high infection rate.

It looks to me from what has been happening in China and Europe that some hotels are closing down due to lack of business and it’s possible to get kicked out.

A smaller family-run hotel could find themselves have too many employees ill to continue running it, along with lack of business.

There are of course a few horror stories out there as well, in the Canary Islands one hotel where there was a confirmed infection went under total quarantine.

This means you could get stuck in a hotel that may not turn out to be mold safe for many weeks or months.

Some hotels are being used as quarantine facilities themselves.

In California they are using them to house those who are homeless. Some are used to house health care workers. Some are staying open to both health care workers and regular bookings (look for extended stay rentals you might be able to book something monthly and it might be a place you can stay).

In China many hotels are temporarily shut down. In Italy, it does not look like as many are completely shut. But with extreme restrictions on movement, you may be de facto quarantined to that location.

Should you leave the country for a safer or warmer place?

Although it might be tempting to leave for the Caribbean or a country that does not yet have the outbreak, there is no guarantee that this will be a safer option in the long term.

Update: The window for this strategy has passed in most of the world (March 18). Most countries are canceling travel insurance, you almost certainly have to come home unless you are working overseas.

Although some have left where they were living in order to come back home in February, I would not leave your home country for another location at this moment (mid March) unless there was a specific spot that you know would be safe and you are prepared to stay there until summer.

If you do need to come back home after leaving, it’s possible you could be put into quarantine upon reentry. Most people are put into self-quarantine. If there is an outbreak on a ship or plane you may be put into forced quarantine.

You would also have to see if you have the needed medical and other supports in the country you want to go to.

Risks that are particularly Worrisome for those Severely Ill with Environmental Illness

True quarantine:

The risk of being put into quarantine is a severe risk for mold avoiders, those with high MCS and those with limited functioning.

Those returning from cruise ships have put into military housing which should not be assumed to be mold safe.

Those crossing certain borders are being put into quarantine housing. You would not want to be forcefully quarantined in a hotel or other facility chosen by the government if you are mold and chemically sensitive.

Caregiver shortage:

For those relying on caregivers, expect shortages of caregivers and for all companies to cut back on hours as any sick employees will be mandated to stay home for two weeks.

I would stock up on things that you are able to eat without cooking like soup in tetra packs, baby food, juice, as well as frozen foods. Anything that could help you get by with fewer helpers.

Grocery delivery services are overloaded and they don’t seem to have found a way to prioritize those who are physically disabled, or very sick.

More grocery stores are offering delivery than were before.

Restaurants are expanding to offer delivery, so keep checking call them and tell them your needs.

Check with local groups in your area many people are volunteering to deliver groceries and many people are out of work and looking for small jobs doing deliveries.

As the crisis progressed it actually became easier to get help that before, but there was a blip between those two situations.

Challenges for those HT sensitive:

For those with HT, if there is any chance of post office closures where you are, stockpile your absolute necessities as much as you can

Special cleaning products for HT, clothes, soap and other necessities that HT avoiders need must be kept safe somewhere.

This is of course a huge challenge and it may be worth taking out a storage locker.

Those who were relying on gyms for storage lockers or showers should have other plans in place.

Clothing stores are closing in affected areas, in less affected areas they are cutting back on hours.

Supplement stores are delayed with their orders due to stockpiling.

All non essential items on amazon .com and .ca are delayed.

Those on the move due to HT avoidance should consider a clean break now (mid march, if doing a clean break do it now time is running out for what’s needed to do this).


Filed Under: Mold Avoidance Paradigm Tagged With: emergency housing, mold avoidance paradigm

Travel Tips for Those with Chemical Sensitivity & Mold Sensitivity

February 20, 2020 by Corinne 6 Comments

Recently many folks have set out on a Locations Effect sabbatical without enough information on the risks or challenges in developing nations. They have run into many unexpected problems that I’m going to outline in this post.

If you have health challenges or environmental sensitivities and you take off unprepared to a developing country this can lead to very difficult and risky experiences.

This post contains affiliate links. Upon purchase, I earn a small commission at no extra cost to you.

Me standing next to a catamaran on Playa Ancon Cuba
Pretty pictures of good days don’t tell the whole story! (Cuba) CC BY-NC-SA

A number of folks recently have set out for locations known to have good outdoor air to experience the Locations Effect.

There are many developing countries (the Global South, also known as third world countries) that have great outdoor air and might also be appealing in terms of cost savings.

But there are a number of really important things to know before you take off if you are someone that has health challenges or mold and chemical sensitivities.

If you haven’t traveled to a developing country before, or you haven’t traveled while sensitive, it’s essential that you know what you are going into.

My Background

I have a 5-year degree in International Development Studies, and my area of expertise is Latin America. I also had to study development factors – poverty, disease, access to health care – in all other regions of the developing world.

I worked for a year in Ghana and have backpacked through Morocco, Ghana, and Togo. In Latin America, I have spent about 7 months total in Cuba, Mexico, and Costa Rica, outside of tourist areas.

I have traveled recently with very high environmental sensitivities to mold and chemicals. I am also immunocompromised and physically limited.

A white girl carrying a large bucket of water on her head in a compound in Adaso Ghana
The compound where I lived in Ghana. CC BY-NC-SA

What you MUST consider before doing a Locations Effect Sabbatical In a Developing Country

1.Much higher disease potential

Mosquitoes fogging in the Caribbean to control for mosquito-borne disease (also a MCS trigger)

Almost all of the developing world has high disease potential. All topical areas, other than very high elevations and a few other exceptions, have very risky mosquito-borne illnesses.

Denge and Chik V are the most concerning for those already sick. Malaria and Zika are the next most concerning. There are a couple of others that you should research as well. Vaccines are not available for most mosquito-borne illnesses.

Parasites are rampant in developing nations. They are mostly in food and water, but can also be caught by walking barefoot or swimming in freshwater.

There are many other illnesses transmitted through food and water: viruses, ecoli, hepatitis, etc. Many of us get sick very easily and it is almost a guarantee if you are immunocompromised.

I cook all my food and take pretty extreme precautions with water after a few really rough experiences.

2. Unexpected MCS (chemical sensitivity) triggers

A town with red dirt roads in Ghana with lots of cars and mini vans called tro tros
This is a town in Ghana: Car exhaust is way higher than you might expect in the developing world CC BY-NC-SA

Possible unexpected MCS triggers include: way more potent (less regulated) car exhaust, more cigarette and cigar smoke in public, burning garbage smoke, scented cleaning products, more cologne or perfume use, increased pesticide spraying both inside for pests and outside for mosquitos.

Other unexpected triggers might include, charcoal burning, wood-burning, exhaust from boats, other people’s mosquito repellant and sunscreen, and widely used incense (including in restaurants) or smudging.

These differ by country.

You may not find any unscented personal care or cleaning products in stores.

3. Unexpected level of mold in buildings

A close up of me outside a new concrete house in the canary islands that was unexpectedly moldy
An unexpectedly moldy building led me to set up a tent in this front yard.

In general, in both developing nations (due to poor building standards), and tropical locations (where mold grows faster), buildings are more likely to be moldy.

If the type of construction is different than where you are coming from, you will not be able to predict which buildings might be OK if you haven’t been there before.

There are exceptions, for some people the general mustiness (or even visible mold growth) in concrete buildings in tropical areas is not enough to affect them. Many can still improve, but those already unmasked probably won’t.

On the other hand, there may be simpler structures available that are even better than buildings in the US, Canada and Western Europe.

If you are aiming to stay in a building, this has to be carefully considered.

I also prepare for the possibility of musty or otherwise contaminated beds and bedding by bringing bedding and tarps to sequester beds.

4. Exasperation of symptoms from heat

Heat exhaustion started for me in Latin America in vehicles that didn’t have AC

If you haven’t traveled anywhere hot for a while, this might be an unpleasant surprise.

You also should look at whether taxis, buses and hotels often have AC (likely many or most don’t).

High-end hotels usually have AC almost anywhere in the world, but even then, not always! Some areas are prone to power outages.

If you are reliant on AC in hot weather you have to think this through carefully.

There are tropical countries that are not that hot and there are developing countries that are not hot at all.

Plan ahead if you know this will be a problem.

5. The safety profile of the area

Many people assume Jamaica is too dangerous. Crime is limited to certain areas of the country. Most of the country is relatively safe and I would not rule it out.
“Jamaica ’14” by keatssycamore is licensed under CC BY-SA 2.0 

While many people do assume that some developing nations are more dangerous, do not go based on news reports. Look up actual statistics. I look at whether crime is isolated to certain areas or certain groups of people.

What are the real risks and will they be likely to affect you in the area you plan to go to and the activities you plan to take part in?

There are many guides to safety for travelers out there. Look at those and then look at special circumstances (like is it safe to camp where camping is not the norm).

Driving is often the biggest risk to personal safety. I consider myself an excellent driver and would never drive in a developing country, at least not until being there for a long time and getting used to the norms.

The Lonely Planet outlines things you need to know like which cities are not safe to walk in after dark and whether you should use a money belt or not. This is always my first resource. They have a book for each country.

6. Do they have the foods you need

A brother and sister pounding fufu in adaso Ghana
Food in Ghana was delicious but it was very different than in Canada. It was hard to find imported foods. CC BY-NC-SA

The foods you are used to might not be available in many developing countries. There may not be organic food stores or no distinction made between organic and conventional produce.

You may not find the types of foods you need or expect. Expect less variety and a different variety of foods. It’s possible that imported foods are extremely expensive.

There are some places that don’t have grocery stores (or the grocery stores are just small stores for canned goods). You may find it hard or almost impossible to gather groceries yourself from all the places they are sold.

It might not be realistic to go gluten-free or vegan.

In Cuba it was prohibited to cook in a casa particular (a bnb).

7. Do they have supplements you need or are you able to order them

A pharmacy in Cuba with basic wooden cubbies for organisation
Farmacias in Cuba are limited. Drug availability is limited. Supplements are also very limited.
“Drugstore in Cuba” by Wagner T. Cassimiro ‘Aranha’ is licensed under CC BY 2.0 

The availability of supplements is limited, sometimes severely limited (possibly nonexistent) in most developing countries.

Some countries have high tariffs on imported goods and it may be extremely expensive for the shipping cost as well.

In some countries like Mexico, it is not legal to order supplements from abroad. In Ghana, it was difficult and very expensive to send anything there by Fedex.

8. Is good medical care available

A hospital room in Ghana with two metal beds
This is one of best hospitals in Ghana. I have been hospitalised 3 times in very poor medical facilities.

If you are on any medication you will want to check if that medication exists in the country you want to go to, and how easy is it to get.

You will also want to look at the quality of medical care, both clinics and hospitals. What kind of ailments (including emergencies) can they address? Which ones are not treated there?

How far away are you from a good hospital if something did happen.

How common is it that doctors and nurses speak your language (or do you speak theirs).

Don’t expect alternative health care – look up whether they have the practitioners you need.

Make sure you have travel medical insurance!

9. Is camping allowed or viable

My Airbnb hosts on the balcony of the home that has my tent on the balcony in La Boca Cuba
My tent on a front-facing, very visible balcony. The whole town knew I was camping but it was very safe and no one discouraged me from doing it.

Camping is mostly a first world activity. If you plan on camping as your primary option or backup option, be sure to research the feasibility thoroughly.

If camping outside of a proper campground, check on the legality, safety and general acceptance of doing this.

If camping is non-existent there, it’s most likely there are no stores in which to buy camping gear that may need to be replaced.

10. Are vaccines necessary

A close up of a needle going into someone's arm to vaccinate them
I got a lot of vaccinations for my travels when I was younger.

There are a few countries that have vaccine requirements, but not that many. If that is the case I would suggest looking at whether they have metal-free options and whether the vaccines are tolerated by you.

Many vaccines are likely recommended (though not required). The first thing I do is check on what the transmission routes of those diseases are. If they are food and waterborne, you may be able to avoid them by cooking your own food.

Some depend on the area you will be in and the likelihood of your exposure. I always look at the Lonely Planet books for everywhere I have ever traveled to as they have very good overviews of disease profiles and vaccine requirements.

11. Noise levels!

People dancing salsa on the beach in the Cayman Islands in front of a hotel
The Caribbean and Latin America in general are loud! I stole this photo from Ricky.

It’s possible and likely that developing countries will be noisier than Western countries – whether it’s traffic, roosters, howler monkies, people who get up very early, or a culture of playing music in public places – this is another thing to know about.

If your sleep is highly affected by noise then plan your strategy accordingly. I like a three-step approach to earplugs for worst-case scenarios. Foam, silicone, and noise protection gear. (And note, don’t count on being able to buy these locally).

I bring a borderline insane amount of things with me, including earplugs and any supplement or medication I think I might need, emergency snacks and scent-free products. Here is my packing list.

You may also want to plan carefully where you stay – whether it’s a rental or campground. Find out what it’s close to. Find out when the holidays are.

I got stuck in Cuba’s week-long New Year’s celebration, woken by howler monkeys in Costa Rica, and was right by the community well in Ghana where everyone pulled water at 5 am.

What else!? A lot…

The rooftops of shacks and a concrete building in a dusty town in Ghana
A typical town in Ghana. CC BY-NC-SA

There many other things that could be different in your destination country.

Rocky roads can be painful for many to drive down, they may not be conducive at all to wheelchairs. There may be very different cultural norms that influence clothing you wear. They may not be tolerant of LGBTQ. There may be limited access to ATMs. Credit cards may not work there. There may be many safety precautions you need to take that you would not think of in your home country. Etc etc etc…..

Most of that you can find in regular travel guides and blogs.

Again, I recommend the Lonely Planet as the first place to look. I’ve never gone anywhere where I didn’t carry the local guide book everywhere.


The 11 factors here are not discussed in normie blogs and books, please make sure you get enough advice on the area you are going to.

If you are ill, sensitive to chemicals or mold you will have challenges that you might not be prepared for.

Filed Under: Mold Avoidance Paradigm Tagged With: mold avoidance paradigm, travel

  • Go to page 1
  • Go to page 2
  • Go to page 3
  • Go to Next Page »

Primary Sidebar

Stay up to date with the Latest!

  • Facebook
  • Instagram
  • YouTube

ABOUT ME

Hi, I’m Corinne, I am a Certified Building Biologist Practitioner with 7 years of experience helping people create healthy homes.

More about me…

Footer

Categories

  • Healthy Building
  • Healthy exteriors/gardens
  • Healthy Interiors
  • Mold Avoidance Paradigm
  • Mold-Free Building
  • Mold-Free Interiors
  • Tiny Homes and Trailers
  • Uncategorized

Amazon Affiliate Disclosure: As an Amazon Associate I earn from qualifying purchases.

Privacy Policy, Disclaimer, Disclosure

Do Not Sell My Personal Information

Resources

Business inquiries

Copyright © 2022 ยท Corinne Segura | My Chemical-Free House Consulting